Giveaway
Before we get to the dish on Dallas Kosher BBQ Championship, don’t forget to enter our giveaway for the new cookbook
Perfect Flavors: Creative, easy-to-prepare recipes inspired by my family and travels by Naomi Nachman:
a Rafflecopter giveaway
*
Destination: Dallas
 About 3 weeks ago Rachel, Elliott (Rachel’s husband) and I headed down to the Lone Star State for the Dallas Kosher BBQ Championship. We compete under the team name of Five Dudes and Vegetarian. Thanks to my awesome wife Ronit for holding down the fort while I was off having fun.
A Little Bit About Kosher KCBS Competitions
I am going to pause here and provide a little background on the format of kosher BBQ competitions established by the Kansas City BBQ Society (KCBS):
Teams compete in four categories: chicken, beef ribs, turkey, and brisket. They are judged by six judges on taste, tenderness, and presentation. Judges score entries on a scale of 2-9, with the lowest judge’s score dropped. The scores are then tallied and the winners are announced.
In order to keep everything kosher, the competition provides all of the equipment, meat, and ingredients. Usually, there is prep time Thursday night or Friday morning ahead of the event. At this point meat, ingredients, and utensils are given out and access to a kosher kitchen is provided. The event swings into full gear Saturday night, where the teams are provided a smoker and a grill. They then start cooking, drinking, and having an all around good time. The teams’ pit-masters tend their fires throughout the night until it is time to turn their hard work in to the judges.
Getting Going
We headed out to the airport at about 3:30 AM with what seamed like the slowest Uber driver ever. We made it in plenty of time for our 5 AM flight. After an uneventful flight we grabbed a rental car and headed to Benny’s Bagels where we grabbed breakfast. Rachel and I got omelets, which to our surprise, they make in the microwave, and Elliott had a bagel and cream cheese. The food was decent for a small bagel joint, but nothing to write home about.
Prep Party
 We then headed to Congregation Beth Torah, the organization that was hosting the the Dallas Kosher BBQ Championship to start prepping for the competition. Most of the local teams had prepped the night before, so it was a pretty light crowd. Shortly after we arrived, our friend and kosher BBQ legend Mendel Segal of Backyard BBQ and Brew in South Florida showed up. He joined us at our Airbnb for Shabbat. It was great to hang out with him for the weekend.
Rachel got started on blending our rubs and simmering our sauce, I started trimming the brisket, and I think Elliott made some phone calls when he wasn’t schmoozing with his mohel (he was born in Dallas) who also happened to be the mashgiach for the event.
Once I was done trimming the brisket, I rubbed it will our classified combination of spices and injected it with our secret elixir (If I ever obtain a 1st place prize in brisket I’ll publish my recipe). Then it was on to the turkey. We decided to spatchcock the turkey, which involves removing the back bone and pressing down on the breasts to flatten to bird so it cooks evenly. I then injected the turkey with an other concoction, and placed a compound margarine under the skin. Finally we let the bird bathe in broth until we were ready to cook it on Sunday.
We intentionally deferred chicken prep until Saturday night. It was was Rachel’s call, as it fell to her to do chicken prep as Debbie, our teammate that usually handles the chicken, did not make the trip. The ribs were not available yet, so we cleaned up and headed out.
Run Around Town
The next stop was Dollar Tree. There is no place better for all the bits and pieces you need to compete in a BBQ competition, or host a Shabbat in a converted garage Airbnb. While we were out we checked out Boot Barn where I bought myself a belt buckle, as well as a Penzey Spices where I went for the free smells.
Then it was off to the new kosher grocery and deli Kosher Palate to pick up some lunch and our Shabbat food. I was able to pick up pretty much everything I needed for Shabbat from grape juice to dessert and everything in between. They have some solid food. I especially liked their Ali’s (named for the chef) chicken, a roast chicken with Mediterranean flavors. We did a little more running around and checked out the local big box grocery store with a large kosher section and then headed to the Airbnb to get ready for Shabbat.
Sabbatical Suds
We got to the Airbnb and after some confusion about how to get in, we started to unload the car and unpack. The Airbnb was small but cozy. Perfect for a quiet Shabbat before the all the excitement of a an overnight BBQ competition. About 45 minutes before Shabbat was to begin Mendel Segal showed up. Friday afternoons with Mendel means one thing, “Beer Before Shabbos”. Beer before Shabbos is short video Mendel does most weeks where he picks a beer to taste and briefly talk about. Elliott and I got our 15 seconds of fame as guests on that week’s episode.
Shabbat was fairly uneventful. We went to shul, ate, and tried to get as much sleep as possible. We knew we needed all the rest we could get before the competition. The Shabbat meals were nice and the company was excellent. The food from Kosher Palate was tasty and spending time with Mendel, Elliott, and Rachel is always enjoyable.
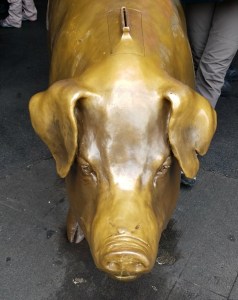
BBQ Bonanza
 After Shabbat we quickly packed up and checked out of the Airbnb and headed to the contest grounds to get set up. With this contest being later in the year, Shabbat was over fairly early, allowing us plenty of time to get organized and relax before the brisket needed to go on the smoker.
Once we got to the contest it was the prefect example of organized chaos. A lot of stuff going on all at once, but all in near-perfect harmony. The organizers seemed to have a perfect handle on everything going on and the volunteers worked diligently to make sure everything went off without a hitch. Special thanks to Brian Rubenstein and Sandy Dorf. They bent over backwards to make sure all the teams that traveled in from out of state were well taken care of.
Rolling Smoke
After getting set up and having a few shots we threw a few hot dogs on the grill for dinner and waited for the time to come to put the brisket on.  Eventually 1 AM came around and it was time get the brisket to get started. I don’t know why, but I had the hardest time getting my smoker up to 250°F. We were using a Weber Smokey Mountain* which is a model I am very familiar with and is quickly becoming the standard for Kosher BBQ competitions, but something just wasn’t clicking.
My theory is the issue was with the charcoal I was using. I was using a brand that I was not used to and it created a lot of ash. The other possibility was I was just not getting a good seal and my smoker was leaking heat. The lid to my smoker didn’t fit quite right which likely was contributing to the issue.
Size Does Matter
Soon after setting up we received our ribs, which were huge! This created a space issue. Usually kosher competitions provide a 22″ Weber Smokey Mountain* and a 22″ Weber Kettle*. When we have smaller ribs, and a turkey breast as opposed to whole bird, we are generally able to fit everything on the smoker without the use of the Weber kettle. Due to the volume of meat we had to cook I ended up doing the turkey on the kettle. The kettle was bit hotter than I wanted and the dark meat got a little dry.
Here Comes the Sun
The ribs went on around 6 AM, a little earlier than usual due to their large size. We then managed to pull together a minyan for Shacharit followed by a Kosher BBQ Competition Shacharit selfie with Mendel Segal, which has become a standing tradition.
Breakfast, featuring bagels and coffee provided by the contest organizers along with shakshuka and french toast that Rachel made were soon to follow. That’s right Rachel managed to make french toast in a foil pan on a charcoal grill.
After breakfast the chicken and turkey went on and the event opened to public. There were all sorts of vendors and activities. I can’t reiterate enough how well this event was organized.
Time for Turn-Ins
A little bit before noon was when the real fun began. Turn-ins were every half hour starting at noon. The energy of the teams putting together their boxes to be presented to the judges is one of those things that defies words. You really need to experience it. (That is an invitation for all of you to visit us at the next competition.)
Chicken
The first category was chicken which came out decently. It is hard to get the pieces to be perfectly uniform when using kosher thighs, as they can vary in size and come with rib bones attached. I can’t complain too much about the chicken though, as we scored better than expected.
 Ribs
Ribs
While the ribs were very large and didn’t lay out well in the pan (we used foil pans instead of the standard foam boxes due to the size), they were excellent quality plate ribs, which are meatier than the back ribs we usually use. Our ribs came out pretty good, not sure why we didn’t score better. I can only theorize that in Texas they like their ribs a little less sweet than we make them.
Turkey
The turkey breast came out pretty moist, but I need to work on my presentation for it. As I mentioned earlier the dark meat came out a bit dry so I didn’t end up putting any in my box.
Brisket
Our brisket took forever to get to temp, but eventually got there. I let some other teams taste my brisket and received positive feedback, but I think the pieces that went to the judges just weren’t the best. In the future I plan to cut the whole brisket and then decide what to put in our box for the judges.
Celebrity Judges
We also provided small portions of all four categories for a panel of celebrity judges, as well as turkey and brisket for the spectators for the People’s Choice award. The celebrity judges included some serious BBQ royalty including Jill Grobowsky Bergus, owner of Lockhart Smokehouse in Dallas, one of the oldest and well known BBQ joints in Texas. Along side her was Daniel Vaughn who has my dream job, the BBQ editor for Texas Monthly Magazine and Gabe Boxer AKA The Kosher Guru.
Results
 We took fifth overall. If you take into account the fact that second, third, and fourth place were separated by less than a point, and the guy who took first has his own BBQ restaurant, I think we did pretty well. After the awards we headed to a local heath club to grab a quick shower. We then headed to the airport for a fairly uneventful flight followed my an Uber home. As soon as I got home I passed out. It was a whirlwind trip, but a lot of fun. We are hoping to return next year, and hope to see you all there!
Don’t forget to check out Rachel’s take on the contest: 2 Dudes & a Vegetarian Do Dallas and Cookbook Giveaway!
*This post contains affiliate links. We at MYV earn a small commission if you purchase an item through one of those links, which allows us to continue bringing you great tasting food.
Like this:
Like Loading...


 Pumpkin Spice Latke


 Drunken Noodles


 I did find one of my favorite Chicago based pickled products there. One of the stores there carries
  seemed like a fairly typical kosher vegetarian Indian restaurant, not unlike
 There is a very large Sephardic Jewish community in Seattle. The main Sephardic synagogue,

 Sausage and Pepper: A Chicago classic featuring Romanian’s Italian Sausage with grilled green and red bell peppers and onions
 The weather begins to cool off this time of year, which also coincides with the Jewish holiday of Sukkot. On Sukkot, the tradition is to build a temporary dwelling outside (usually a hut without heat or insulation), know as a sukkah. Many people eat all of their meals in the sukkah and some have the custom to sleep in the sukkah as well. This is when I often turn to hearty, long-cooked dishes. These stick your ribs, soul warming dishes are some of my favorite comfort foods. I have very fond memories of sitting in my parents sukkah on a chilly fall night and warming my bones with things like mushroom barley soup, roasted root vegetables (AKA tzimmis), and stuffed cabbage. This time of year is particularly special for me as my lunar birthday falls out during sukkot, and my mother always tried to make some of my favorite dishes.

 Menu
Menu

 Don’t Forget the Giveaway


 Folks, we are in the period known as “
 meat. We used this as an opportunity to do a test cook for our upcoming

 Hang on folks because this one is a bit long (at least for my posts). If you like BBQ I promise it is worth it. If you make it to the end your patience will be rewarded with an award-winning rib recipe (or you could just scroll down to the recipe, I won’t tell).
 To be honest, I don’t know how I could have done it with them. The festival took care of the fundraising and logistics such as tents, lighting, water, refrigeration, and port-o-potties. I was also able to obtain ten smokers and ten grills from the organizers of the original Chicago Kosher BBQ Competition. That helped us over the major hurdle of finding equipment, but at the same time that became our maximum number of teams.
 ll Stop the Rain


 devoid of meat. Strict Jewish law prohibits eating dairy and meat at the the same meal. For many people that means dishes like cheese lasagna, sweet blintzes (Jewish crepes), and cheesecake for dessert, but for me it has has always been an excuse to bust out the butter and heavy cream, taking the opportunity to trade the traditional chicken soup for something a little more rich and decadent.
You must be logged in to post a comment.