Winning the 3rd annual Adas Yeshurun Cholent Cookoff!

It probably seems a bit weird…a non-meat eater winning a cholent cookoff?  Well, that’s exactly what happened a few weeks ago when I beat out 5 other people at my synagogue’s 3rd annual Adas Yeshurun Cholent Cookoff!  Okay, it was

Wiinner Winner Cholent Dinner
Disclaimer – this photo was taken before the event, so no Sabbath laws were broken 🙂

ONLY 6 entries, but hey, I’ll take that trophy any day!

BACK TO THE BEGINNING

Maybe we need to start at the beginning, but what exactly is “cholent“?  A meat stew that simmers from Friday afternoon to Saturday afternoon, the star of Shabbat lunch – usually includes meat, potatoes, barley, beans and anything else in between, like garlic, onion, BBQ sauce – you name it!  Sky’s the limit!

I’ve entered our shul’s cookoff every year (and since my husband organizes it, I want to help support him).  The first year was “no bueno”.  I made a vegetarian one, because since I don’t eat meat, I figured why not set myself apart with a different cholent?  Maybe it’s a good thing to make something different, aye?  Uh, not so much.  Clearly not a crowd favorite, but no harm done.  I’ve learned my lesson.

Working Hard on he cholent
Ellie hard at work…or hardlyworkin’?

SECOND PLACE ‘AINT SO BAD!

The second year, I basically put in a half a cow.  I used all of the ingredients the shul (synagogue) provides to us – a can of peeled potatoes, kishka (sausage), meat, beans & barley (not too much), and some spices.  Added honey because I know the shul’s cholent is on the sweeter side and our congregants LOVE it (so much so, that the shul’s cholent won the first year of the competition, so they’re not allowed anymore to compete, it’s a bit of an unfair advantage!). And finally, BBQ sauce, and frozen pearl onions for extra sweetness (and much easier then chopping onions).

Last but not least, PASTRAMI!  Technically it’s the meat ends that I add in the cholent (but I guess the secret is officially out!).  Needless to say, I came in 2nd place last year.  A much improved placing, but I still had some work to do.


We have the meat for the cholent
She’s a beauty!

THIRD TIME’S THE CHARM!

Now THIS was my year to really shine and show the crowd my cooking chops.  It’s tricky though, making cholent in a big foil pan in the oven.  Nope, this isn’t your regular Shabbos cholent simmering away in your slow cooker.  The technique to winning this cook-off is all about how much water you put in.  And since it starts cooking Friday morning, the kitchen crew (usually my hubs) always adds in extra water so it doesn’t burn.

Do I measure my ingredients? Nah, I’ve gotten pretty good at eyeballing everything.

As for the rest of my secret ingredients?  Well, I’m not going to give all of them away, but I feel like I’ve already said too much! 🙂

Until next time…Shabbat Shalom ya’ll!

Ruben Flat Bread

Ruben Flat BreadsRuben Flat Bread

Rachel recently posted a recipe for Smoked Salmon and Avocado Stacks. That motivated me to come up with an easy appetizer recipe of my own.  I have always loved making fun appetizers. On a Shabbat morning when I am expecting guests for lunch, I can often be found spending hours meticulously plating my appetizers. This drives my wife crazy.  She is always concerned that a guest may not like the appetizer, and often insists that appetizers be served family style on a large platter with any adornments such as sauces and garnishes on the side.

Flat breads seem to be all the rage today, and the meat pizza seems to be the king of it all. I wanted to take that concept and create something that was quick, approachable, and familiar. The Ruben sandwich is probably one of the most quintessential Jewish dishes. I decided to take those flavors and make a flat bread out of it.  This recipe is super quick and easy, with the exception of caramelizing the onions which can be done in advance.

I know caramelized onions are not traditional in a Ruben, but they add a richness that one often gets from the Swiss cheese used in many “kosher style” delis.  In a strictly kosher kitchen, mixing meat and dairy products is forbidden. The caramelized onions also act as an edible adhesive to help the other ingredients stick to the flat bread.

I was looking for a quick and easy recipe and therefore used a store bought flatbread or more specifically I used *Bistro Buns By Brooklyn Bred. They are nice and thin with a good texture and not too big.

2.5 from 4 votes
Ruben Flat Breads
Ruben Flat Breads
Prep Time
5 mins
Cook Time
5 mins
Slow cooker time
12 hrs
Total Time
10 mins
 

 A quick, approachable, and familiar dish that works well as an hors d'oeuvre, appetizer, or even a small meal. This recipe takes the flavors of a Ruben sandwich, one of the most quintessential Jewish dishes, and makes a flat bread out of it. 

Course: Appetizer, Hor d'oeuvres
Cuisine: Jewish
Keyword: flat bread, ruben
Servings: 4 people
Author: Daniel Peikes
Ingredients
Flat Breads
  • 1 Cup Corned Beef Sliced and roughly chopped
  • 2 Flat Breads I used store bought, but you could make your own
  • 1/2 Cup Sauerkraut Thoroughly drained
Russian Dressing
  • 1/4 Cup Mayo
  • 1/4 Cup Ketchup
Slow Cooker Caramelized Onions
  • 3 tbsp Olive Oil
  • 3 Large Onions Chopped
  • Salt and Pepper To taste
  • Giardiniera Optional if you like some heat
Special Equipment
  • Small Slow Cooker AKA Crock-Pot
Instructions
Caramelized Onions
  1. Add the onions, olive oil, salt, and pepper to the slow cooker and cook on high for 12 hours.

Russian Dressing
  1. Combine the mayo and ketchup in a mixing bowl.  Stir until thoroughly combined.

Flat Bread
  1. Preheat your oven to 350°F

  2. Top the flatbread with the onions and then a layer of corned beef.  Bake until the corned beef begins to crisp up.

  3. Remove the flatbread from the oven and top with the sauerkraut, Russian dressing, and giardiniera. Slice in to strips or triangles and serve immediately.

Check out some of our other appetizers:
Deviled Eggs
Fried Pickles
Barbecue Chicken Hamantaschen

*This post and recipe contains affiliate links. We at MYV earn a small commission if you purchase an item through one of those links, which allows us to continue bringing you great tasting food.

Smoke on the Water: Organizing a BBQ Competition In the Rain and Award Winning Ribs

Hang on folks because this one is a bit long (at least for my posts). If you like BBQ I promise it is worth it.  If you make it to the end your patience will be rewarded with an award-winning rib recipe (or you could just scroll down to the recipe, I won’t tell).

Back Where (Kosher Competitive) BBQ (In Chicago) All Began

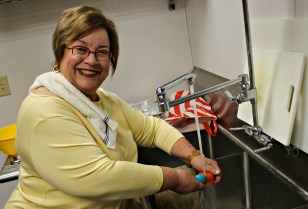
What you may or may not know is that Rachel and I have a competitive kosher BBQ team called 5 Dudes and a Vegetarian.  Here is a little history how that came to be. In 2014, I competed in my first kosher BBQ competition at Anshe Emet Synagogue in the Lakeview neighborhood of Chicago. I assembled a team, developed some recipes, watched some YouTube videos, and came up with a plan.

Kosher BBQ Competitions KCBS Style5 Dudes and a Vegetarian

I am going to pause here and provide a little background on the format of kosher BBQ competitions established by the Kansas City BBQ Society (KCBS):

Teams compete in four categories, chicken, beef ribs, turkey, and brisket. They are judged by six judges on taste, tenderness, and presentation. Judges score entries on a scale of 2-9, with the lowest judge’s score dropped. The scores are then tallied and the winners are announced. In order to keep everything kosher the competition provides all of the equipment, meat, and ingredients.  Usually, there is prep time Thursday night or Friday morning ahead of the event. At this point meat, ingredients, and utensils are given out and access to a kosher kitchen is provided.  The event swings in to full gear Saturday night, where the teams are provided a smoker and a grill, and start cooking, drinking, and having an all around good time.  The teams pit-masters tend their fires throughout the night until it is time to turn their hard work in to the judges.

Now back to Our Regularly Scheduled Program

Prep was on Friday afternoon at Milt’s BBQ for the Perplexed, who was co-hosting the event.  My teammates and I spent a good few hours blending a myriad of spices, trimming meats, and simmering sauces.  We had a different rub and sauce for each meat, which I have since learned is definitely NOT the way to go, but that is a story for another time.  There were close to 20 teams, which made for some close quarters, while working on little 4-top restaurant tables.   While this wasn’t ideal it did make for great camaraderie between the teams.

If I had to pick the thing I like the most about competing in kosher BBQ competitions, it is relationships I have developed over the years with other teams.  I have met a lot of awesome people and made some great friends.  I want to call out one specific person who I met on my BBQ odyssey, Mendel Segal. Mendel Segal, currently the pit-master at Backyard BBQ and Brew in Surfside, FL, was helping organize the event.  At the time he was the executive director of the Vaad Hakashruth of Kansas City, and is responsible for bringing competitive BBQ to the kosher world.  He has encouraged me to indulge my BBQ obsession, and guided me along the way.

Time to Kick the Tires and Light the Fires

Now let’s fast forward about thirty hours. We showed up Saturday night at Anshe Emet  to cook (and drink) through the night. To be honest, despite all of the planning and research I had done, I made lots of rookie mistakes, but again that is a story for another time. The weather was perfect, the crowd was great, and a good time was had all around. To be honest I don’t remember how we did in three of the four categories, but we did take home a third place trophy for our BBQ Baked Beans (this was early on, so they did beans instead of turkey).

From there on I was officially hooked. Since then we have competed in kosher competitions in Kansas City and St. Louis.  This year we are hoping to compete in Dallas, Boca Raton, and Phoenix.  The Chicago competition lasted one more year and then fizzled out, that is until this year.

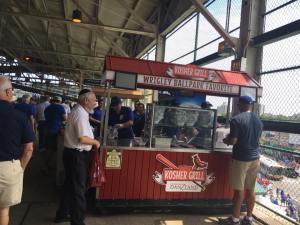
Bringing BBQ Back to the Windy City

I was determined to bring kosher competition BBQ back to Chicago (and compete in it at the same time), but I knew I could not do it alone.  I reached out to the organizers of the Greater Chicago Jewish Festival.  Back in 2014 their event was the week after the Chicago Kosher BBQ Competition.  Their event has been running for decades. They have large outdoor event logistics down to a science. When I approached the organizers about incorporating the Kosher BBQ Competition in to the Jewish Festival they were very excited about it.

BBQ SmokersTo be honest, I don’t know how I could have done it with them.  The festival took care of the fundraising and logistics such as tents, lighting, water, refrigeration, and port-o-potties.  I was also able to obtain ten smokers and ten grills from the organizers of the original Chicago Kosher BBQ Competition. That helped us over the major hurdle of finding equipment, but at the same time that became our maximum number of teams.

Help! I Need Somebody, Help!

Having someone else worrying about logistics freed me up to concentrate on the BBQ competition and its culinary related tasks. One thing I learned the hard way is that putting on a BBQ competition is way more work than you could possibly imagine. Only attempt this if it is truly your passion.  If you just think it will be something fun to do, or if you are on the fence, do not attempt it.  Also, get trusted help, and more of it than you think you need.  Even with the help of the fine folks from the Greater Chicago Jewish Festival and some occasional help from friends* this was still way more work than I expected.

Below is just a small list of things I needed to attend to:

Building a website (www.chicagokosherbbqcompetition.com)

Promoting the event on social media

Registering teams

Purchasing equipment

Buying ingredients

Ordering meat

Coordinating with KCBS

Coordinating with the festival

and so much more…..

One day I’ll write a book about organizing a BBQ competition but suffice it to say it is a lot of work.

Who’BBQ Prepll Stop the Rain

While most things went fairly smoothly, but there were some minor issues and one big one. Prep went well Thursday night and the logistics came together nicely on Friday.  The teams arrived fairly promptly on Saturday night and started cooking. All was going well until about 3:00 AM when it started raining buckets.  Luckily we were under a tent, but we definitely were not on high ground and the tent flooded.  It rained on and off through the night and the next morning, leaving the grounds a muddy mess.

As I stated earlier, the greatest thing about competition BBQ are the relationships you make.  When you have less than ideal conditions, like crummy weather, it serves to strengthen those relationships.  Teams help each other out and everyone just tries to laugh it off together. My team was in the area that was flooded the worst and the team next to us went out of their way to help us move our smoker out of the mud.  To be honest, most of the cooking was a bit of a blur but the overall camaraderie really did make an impression on me.BBQ Rain

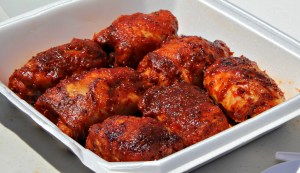
At the end of the day my team took home a first place trophy for our ribs (see recipe below), and third overall.  I would be happy with those results at any competition. The fact that I spent most of my energy organizing the event and not competing, made those results that much sweeter.

Check out Rachel’s take on the competition here: 2018 Chicago Kosher BBQ Competition!

BBQ Ribs Trophy

*Thank you to  Robert Feiger, Ryan Gottesman, and Elliott Fliegelman for all your help with the manual labor. Thanks to Debbie and Dennis Burg for the use of you power washer. Thanks to Eli “Moose” Greenberg for help with the refrigeration situation. Thanks to all the teams for coming out and staying even when the weather got rough. Thanks to the fine folks of the Greater Chicago Jewish Festival for welcoming us in to their event. Finally, thanks to Steven Weinberger for everything.


4.5 from 2 votes
BBQ Beef Ribs
Award Winning Ribs with Pomegranate BBQ Sauce
Prep Time
5 mins
Cook Time
4 hrs
Coal Lighting
15 mins
Total Time
4 hrs 5 mins
 

This is my award winning rib recipe that took first place in the 2018 Chicago Kosher BBQ competition. The recipe includes instructions for cooking on a smoker or in an oven.

Course: Main Course
Cuisine: BBQ
Keyword: BBQ
Servings: 5 Bones
Author: Daniel Peikes
Ingredients
  • 1 Rack Beef Back Ribs 5 Bones
  • 2 Cups Apple Juice In a spray bottle
Spice Rub
  • 1/2 Cup Kosher Salt
  • 1/2 Cup Black Pepper
  • 1/2 Cup Dark Brown Sugar
  • 1/4 Cup Granulated Galic
  • 1/4 Cup Granulated Onion
  • 1/4 Cup Paprika Smoked if you have it
  • 1/4 Cup Celery Seed
Pomegranate BBQ Sauce
  • 2 Cups Ketchup
  • 1/2 Cup Pomegranate Molasses
  • 1/2 Cup Dark Brown Sugar
  • 1/2 Cup Honey
  • 1/2 Cup Apple Cider Vinager
  • 1/2 Cup Spice Rub
  • 1/2 Cup Apple Juice
Optional Special Equipment if You are Smoking Your Ribs
  • 1 Smoker
  • 2 Logs Apple Wood For flavor
  • 2 Logs Cherry Wood For flavor
  • Charcoal/Propane/Electricity/Wood For fueling your smoker
Instructions
Spice Rub
  1. Add the kosher salt, pepper, granulated garlic, granulated onion, paprika and celery seed to a large mixing bowl and stir until thoroughly combined. Reserve a 1/2 cup of the spice rub for the sauce.

Rib Preparation
  1. Start by removing the membrane from the back of the ribs.  This isn't 100% necessary but makes for a more tender rib and allows for better smoke penetration, if you decide to smoke the ribs. Then trim any loose bits of meat and fat as they will just burn during cooking.

  2. Sprinkle the ribs liberally with the spice rub on both sides.

Smoking Instructions
  1. If you are going to smoke the ribs, fire up your smoker to 250°F and put in a log each of apple and cherry wood. Place the ribs on the rack concave side down. 

  2. After about an hour add the other 2 logs. If you see spots on the ribs that start to look dry spray with the apple juice.

  3. Cook until the tender, about 3 hours. A skewer should slide through the meat with almost no resistance.

Oven Instructions
  1. Preheat your oven to to 250°F and the put the ribs on a foil lined sheet pan.

  2. Bake until the tender, about 3 hours. A skewer should slide through the meat with almost no resistance.

Pomegranate BBQ Sauce
  1. Add the ketchup, pomegranate molasses, brown sugar, honey, apple cider vinegar, apple juice, and spice rub to a medium pot. Place the pot over medium heat and simmer, stirring constantly until all the solids are are dissolved.

  2. Lightly brush the ribs with the sauce and place back on the smoker or in the oven  for 5 minutes to set the sauce.  Slice and serve immediately.

A Tale of Two Tamales: A Lesson in Leftovers

In celebration of Cinco de Mayo this week, I challenged Rachel to make tamales.  I decided to go fairly traditional for mine, with just a slight twist on the flavors.

TamalesWhat are Tamales?

A tamale is a filled corn flour dumpling, usually wrapped in a corn husk (which can be found in most major grocery stores) and steamed, originating from Central and South America.  Some cultures use sections of banana leaf instead of the corn husks when making tamales, but they can be hard to find and are very perishable.

This weekend I made a simple roast chicken for dinner Friday night and pulled beef for lunch on Saturday.  My kids, like many, complain about eating leftovers.  What can I do to reinvent these proteins?  Tamales! While  tamales are often filled with shredded pork, there is no reason you couldn’t use beef, poultry, fish, or even vegetables for your filling. Included are two filling recipes that make great use of leftover chicken and pulled beef.

I have broken this down to 3 recipes, plus a bonus recipe.  The first recipe is for the tamale dough, assembly, and cooking.  The other two recipes for the chicken and beef fillings and the bonus recipe is for a jerk seasoning that is used in the chicken filling, but can be used to season a myriad of things.  Feel free to play with the filling recipes and adjust them to your liking.  These go great with my fermented hot sauce.

Tamale Dough, Construction, And Cooking Instructions

5 from 1 vote
Tamales
Tamales
Prep Time
30 mins
Cook Time
1 hr
Husk Soaking Time
1 hr
Total Time
1 hr 30 mins
 

Tamales are a delicious steamed  dumpling that hails from Central and South America.  It is usually made from a corn flour dough that is wrapped around a filling.  The filling is traditionally some sort of meat, but could be vegetables or even fish.  Tamales make a great snack, side, or even a small meal, especially when served with some salsa and guacamole.  Don't forget the hot sauce and beer to wash it all down.

Course: Main Dish, Side Dish, Snack
Cuisine: Latin, Mexican, Tex-Mex
Keyword: tamales
Servings: 24 Tamales
Author: Daniel Peikes
Ingredients
  • 3 1/2 Cups Corn Flour (Masa) Not corn meal, this is much finer
  • 4 oz Schmaltz or Vegetable shortening Or lard if you are not kosher
  • 1 Tablespoon Kosher Salt
  • 1 tbsp Baking Powder
  • 4 Cups Stock Chicken, Beef, or Vegetable depending on your filling
  • 1 Cup Filling See recipes below
  • 24 Dried Corn Husks
Special Equipment
  • Butchers Twine
  • Large Pot With a Steamer Basket
Instructions
  1. Put the corn husks in a large bowl and pour 5 cups of boiling water over the husks. Let soak for an hour.

  2. In another bowl add the corn flour, baking powder, and salt and stir to combine thoroughly.

  3. Melt the schmaltz/shortening and add it to the stock.

  4. Add the stock and fat to the dry ingredients slowly, you may not need all of the liquid mix, and knead until a clay like dough is formed.

  5. Place a corn husk in front of you with the wider end facing away from you.

  6. Place 2 tablespoons of dough on the husk and press in to a rectangle starting a 1/2" from the top and sides of the husk and should be about 1/2 the length of the husk.

  7. Place 2 teaspoons of the filling in the middle of the dough rectangle and form in to a log shape. Avoid getting too close to the any of the sides.

  8. Using the husk, form the dough around the filling and and then roll the husk around the filled dough. 

  9. On the seam side fold the the bottom section of the husk up. and place upside down.  Once you have 3 tamales complete tie in to a bundle using the butchers twine, with the seams facing in.  Place the bundle in the steamer basket with the open side facing up.

  10. Add water to the pot, so it comes just below the steamer basket and bring it to a boil.  Turn the heat down to medium and place the steamer basket over the water.  Steam covered for about an hour and eat immediately or allow to cool, wrap in plastic, and freeze.

Tamale Fillings

5 from 1 vote
Tamales
BBQ Beef Tamale Filling
Prep Time
5 mins
Cook Time
10 mins
Total Time
15 mins
 

This works great with cheaper cuts of meat like chuck, shank, or brisket.  Stay away from something like rib eye. Don't limit yourself to just using this for for tamales. It can be used in kreplach, egg rolls, or just put on a hamburger bun and eaten as a sandwich.

Course: Filling, Main Course, Sauce, Side, Snack
Cuisine: BBQ, Latin, Mexican, Tex-Mex
Keyword: tamales
Servings: 3 Cups of Filling
Author: Daniel Peikes
Ingredients
  • 1 Cup Shredded Beef Leftover chuck roast, or pot roast work great. You could use brisket but stay away from the pricey cuts like rib roasts.
  • 1/2 Cup BBQ Sauce
  • 1 Cup Water
  • 1 Large Onion Chopped
  • 3 Cloves Garlic Chopped
  • 1 Bell Pepper Diced
  • 2 Tablespoons Olive Oil For sauteing
Special Equipment
  • 1 Medium Sauce Pan With Lid
Instructions
  1. Add the olive oil to medium sauce pot and place over medium heat. Add the onions and saute until the onions start to brown.

  2. Add the garlic and bell pepper to the pot and continue sauteing until the peppers start to soften and the garlic starts to brown.

  3. Add the beef, BBQ sauce, and water. Turn down to low, cover, and simmer for about 10 minutes, stirring regularly to prevent burning.  Allow to cool before using as filling

5 from 1 vote
Tamales
Jerk Chicken Tamale Filling
Prep Time
5 mins
Cook Time
10 mins
Total Time
15 mins
 

This is a great way to use up leftover chicken or turkey.  One note, do not use the entire recipe of jerk seasoning.  It is strong stuff, two tablespoons should be enough.  Don't limit to just using this for for tamales.  It can be used in won tons, crepes, or even ravioli.

Course: Filling, Main Course, Sauce, Side Dish, Snack
Cuisine: Jamaican, Latin, Mexican, Tex-Mex
Servings: 3 Cups of Filling
Author: Daniel Peikes
Ingredients
  • 2 Cups Shredded Roast Chicken No need to make fresh. Use leftovers or even store bought rotisserie will work in a pinch
  • 1 Cup Chicken Stock
  • 1 Large Onion Chopped
  • 3 Cloves Garlic Chopped
  • 2 Tbsp Jerk Seasoning See recipe below. Store bought can be used in a pinch.
  • 2 Tbsp Olive Oil
Special Equipment
  • 1 Medium sized sauce pot with a lid
Instructions
  1. Add the oil, onions, and garlic to a medium sauce pan and place over medium heat.  Saute until the onions start to brown.

  2. Add the chicken, stock, and seasoning. Turn down to low, cover, and simmer for about 10 minutes, stirring regularly to prevent burning. Allow to cool before using as filling.


4.5 from 2 votes
Tamales
Jerk Seasoning
Prep Time
5 mins
 
Course: Seasoning
Cuisine: Jamaican
Author: Daniel Peikes
Ingredients
  • 1 tbsp Brown Sugar
  • 1 tbsp Kosher Salt
  • 1 tbsp Garlic Powder
  • 1 tbsp Onion Powder
  • 1 tbsp Black Peppercorns
  • 1 tbsp Juniper Berries
  • 1 tbsp Cloves
  • 1 tsp Nutmeg
  • 1 tbsp Thyme
  • 1 tsp Red Pepper Flakes
  • 1 tsp Cayenne Pepper
  • 1 tsp Cinnamon
  • 1 tbsp Smoked Paprika
Special Equipment
  • Spice or Coffee Grinder
Instructions
  1. Grind the salt, red pepper flake, peppercorns, cloves, and juniper berries, together in an electric spice or coffee grinder and pour in to a bowl.  Add all the other ingredients and stir combine. 

Don’t forget to check out Rachel’s tamale recipe: Spicy Salmon Tamales

Ultimate Hummus Plate

HummusIn honor of Yom Ha’atzmaut and Israel’s 70th birthday I challenged Rachel to a chickpea (AKA garbanzo bean) challenge.  Chickpeas are the main ingredient in hummus, the increasingly popular paste that Israelis eat like Americans eat peanut butter.  I realize in this challenge I am taking Rachel on on her own turf giving me a distinct disadvantage.  The only way to beat an enemy on their own turf with superior fire power, in this case meat and fried food.

Below are three different chickpea recipes that are each great on their own, but truly shine when combined on a single plate. The  smooth hummus, the crunchy chickpeas, and soft falafel balls with a crispy exterior makes for a great textural contrast.  To combine them simply spread the hummus in a thick layer on a plate and top with the ground beef and onions, falafel balls, and roasted chickpeas.  Serve alongside some fresh pita for a great appetizer or even a main course.  If you you have a vegetarian or a vegan in the house just simply omit the ground beef.

5 from 1 vote
Hummus
Hummus With Ground Beef and Sauteed Onions
Prep Time
30 mins
Cook Time
15 mins
Total Time
45 mins
 

Hummus with ground beef, an Israeli favorite, is great dish that can be eaten as main dish, side dish, appetizer, or snack.  You could use store bought hummus, but why do that when making it yourself is so easy and so much better.

Course: Appetizer, Main Course, Side Dish, Snack
Cuisine: Israeli, Jewish, Kosher, Mediterranean, Middle Eastern
Servings: 1 Plate
Author: Daniel Peikes
Ingredients
Hummus Ingredients
  • 15 oz Canned Chickpeas (Garbanzo Beans) Skins removed
  • 2 Cloves Garlic
  • 3 Tablespoon Lemon Juice
  • 1 Teaspoon Ground Cumin
  • 2 Tablespoons Tahini Paste
  • 1/4 Cup Olive Oil
Ground Beef Ingredients
  • 1 Large Onion Diced
  • 1/2 lb Ground Beef
  • 2 Tablespoons Shawarma Seasoning This can be bought pre-made or you can make it yourself by blending coriander, sumac, cumin, cinnamon, cardamom, black pepper, turmeric, cloves, and allspice.
  • 2 Tablespoons Olive Oil
Special Equipment
  • Food Processor fitted with the "S" Blade
Instructions
Hummus
  1. Add all the Hummus ingredients except the olive oil to the food processor.  Process until a paste starts to form.  If the paste starts to climb up the sides of the bowl, turn off the food processor, remove the lid, and scrape it down with a soft spatula.

  2. With the food processor still running, slowly drizzle in the 1/4 cup olive oil.  Continue to process until the paste is completely smooth.

Ground beef with sauteed onions
  1. Sprinkle the ground beef with the shawarma seasoning, making sure the shawarma seasoning is well distributed.

  2. Take your largest, heaviest, frying pan and add the 2 tablespoons of olive oil and put over high heat.  If you have a cast iron skillet, this is a good time to use it.

  3. Once the pan is very hot, crumble in the ground beef.  Cook on each side until nicely browned.

  4. Remove the ground beef, leaving the rendered fat in the pan.  Turn the heat down to medium and add the onions.

  5. Saute the onions until they just start to brown.  Remove the onions and combine with the ground beef.

Assembly
  1. Spread a thick layer of the hummus on a plate and top with the ground beef and onions.  Serve immediately with pita on the side.

Recipe Notes

I call for canned chickpeas with the skins removed in this recipe.  I find that if you don't remove the skins from the chickpeas the hummus has a gritty texture.  If that doesn't bother you than you can use the chickpeas right out of the can.  To remove the skins, just lightly squeeze each chickpea between your fingers.  It is a bit labor intensive, but I think it is worth it.

5 from 1 vote
Hummus
Falafel
Prep Time
30 mins
Cook Time
30 mins
Soaking Time
1 d
Total Time
1 hr
 

A great fried treat.  Excellent in pita with all the fixings or at side dish or snack all on its own.

Course: Main Dish, Side Dish, Snack
Cuisine: Israeli, Kosher, Middle Eastern
Servings: 24 Balls
Author: Daniel Peikes
Ingredients
  • 16 oz Dried Chickpeas (1 Bag) Do not substitute canned
  • 1 Cup Chopped Scallion You can use the white and green parts for this recipe
  • 1 Cup Fresh Parsley Stems removed
  • 1 Cup Fresh Cilantro Stems removed
  • 1/4 Cup All Purpose Flour
  • 2 Tablespoons Cumin
  • 4 Cloves Garlic
  • 1 Teaspoon Cayenne Pepper Optional
  • Salt and Pepper to Taste
  • Vegetable Oil For Frying
Special Equipment
  • Food Processor Fitted With "S" Blade
  • A Large Heavy Pan to Fry In Cast iron skillet if you have it
Instructions
  1. Pour the chickpeas in a large bowl and cover with water.   Allow to soak overnight.

  2. Add all the ingredients, except the frying oil to the food processor.  Process until a thick paste is formed.  Do not over-process or it will get too thin. 

  3. Roll the mixture into balls roughly 1 inch in diameter.

  4. Put your frying pan or cast iron skillet over medium heat and add enough oil to come 3/4 of inch the way up.  Make sure the heat is not too high, otherwise the outside of the falafel will burn before the inside is cooked.

  5. Fry on each side until dark brown.

5 from 1 vote
Hummus
Roasted Chickpeas
Prep Time
5 mins
Cook Time
10 mins
Total Time
15 mins
 

A great crunchy snack.  You can eat these on there own, as a salad topping or as part of a hummus plate.  Feel free to play with spices here.  If you don't like curry powder use garlic powder, onion powder, and paprika.  If you are using canned chickpeas as I did, just be careful about adding too much salt as, most canned chickpeas are already seasoned. 

Course: Side Dish, Snack, Topping
Cuisine: Israeli, Jewish, Kosher, Mediterranean, Middle Eastern
Servings: 2 servings
Author: Daniel Peikes
Ingredients
  • 15 oz Canned Chickpeas (Garbanzo Beans) Drained
  • 1/2 cup Olive Oil
  • 1/4 cup Thai Red Curry Powder Can be bought pre-made or blended from chili pepper, garlic, lime peel, galangal, coriander, lemongrass, black pepper, cumin, fennel, mace and shallots
  • 2 Tablespoons Paprika
Special Equipment
  • 1 Sheet Pan Lined With Parchment Paper
Instructions
  1. Preheat your oven to 425°F.

  2. Toss the chickpeas with the olive oil, making sure they are completely coated.

  3. Spread the chickpeas out on the sheet pan, making sure they are not touching each other.

  4. Bake until crispy, about 10 minutes.

  5. While still hot, toss the chickpeas with the Thai red curry powder and the paprika.  Serve immediately or store in a resealable bag or container once cooled.

Don’t forget to check out Rachel’s chickpea post: Chickpea Curry

Review: Backyard BBQ & Brew in Surfside, FL

Surprise with Mendel!

Upon walking into Mendel’s joint, Backyard BBQ and Brew, the first impression I got was a cool and hip ambiance with a laid back attitude, a place to chill with amazing food and drinks. The artfully decorated walls displaying just a sampling of Mendel’s awards from various BBQ competitions that he has been competing in for only the past few years, give testimony to the flavors that will be tasted in your mouth shortly.

Look at that BBQ trophy!

I ordered the BBQ burger (per Mendel’s suggestion), half pound beef patty, cooked medium rare that was skillfully layered with pulled brisket, BBQ sauce and topped with crunchy fried onions. Add a side of house fries and this is sure to fill even the most manliest of men. As I hungrily bit into the steaming burger, my mouth was thrown into a flavor frenzy between the savory ground beef and the sweet tanginess of the brisket, mixed with Mendel’s sweet and tangy BBQ sauce (available on Amazon or ask your local grocery store).

Meaty goodness

After 3 large bites I was surprised to discover that I had only consumed only half the burger and still had the house fries to attack. I decided to come up for air to sample the delicious house fries and wash it down with 2 gulps of Boulevard wheat beer.

While inquiring about the selection of beer, Mendel was excited to divulge that they are hoping soon to have a selection of over 40 craft beers on hand available in cans or bottles. His reasoning was eye opening; he revealed that cans/bottles have a more consistent flavor in the batches they make versus kegs that are brewed on a smaller scale for each individual keg. This was a small, yet interesting detail that most restaurant owners don’t contemplate but Mendel does. It’s all about the details.

When I wasn’t lovingly staring at my burger, I was able to glance up and catch parts of the football game being shown on two giant 55” TVs on the wall behind the bar.

As I finished my meal I was genuinely filled and satisfied and not needing any dessert. And then a server happened to be walking past me with a fresh slice of Mendel’s famous Maple Bourbon Pecan pie. Although I did pass on ordering it, the aroma of it wafting from the table across from me did make me seriously contemplate getting a slice to go.

The environment of the restaurant makes me want to stop in every Sunday, around noon and stay to eat all afternoon until the final game of Sunday Night Football is finished. I can definitely see myself hanging out here with a group of football or baseball fans to root for our favorite teams.

Two hours later I commented to my wife Rachel (a.k.a. “riskyveggie”) how tasty that burger was and how satisfied I still was. My wife commented that I should just write a blog entry about it and let everyone else know my experience from stopping by Mendel Segal’s place, Backyard BBQ & Brew. I highly recommend visiting there as often as you can while visiting Surfside/Miami area.

Check out Daniel’s review of the restaurants he visited while in South Florida:

South Florida Trip-Kosher Restaurant Review

Stay hungry my friends!

Daniel’s Recap of the 2nd Annual St. Louis Kosher BBQ Competition

I have been meaning to get this post out for a while, but it was a pretty crazy summer and life got in the way. Back on June 25th, 2017, Rachel and I competed in the 2nd Annual St. Louis Kosher BBQ competition hosted by Nusach Hari B’nai Zion (NHBZ) under the banner of our kosher BBQ team “5 Dudes and a Vegetarian”. It was a whirlwind trip that included kosher BBQ, Indian food, and doughnuts. Rachel’s husband Elliott picked me and Rachel up from her office Thursday afternoon and of course it began to rain just as we were leaving. Lucky for us, the rain didn’t last long.  We hit a little traffic leaving Chicago but still made decent time, getting to St. Louis at about 9:30PM and crashed for the night.

The next morning, after some coffee and Krispy Kreme doughnuts provided by our awesome BBQ teammate, Debbie Burg, we got down to work prepping for the competition at NHBZ. The competition was sanctioned by the Kansas city BBQ Society (KCBS).  Their are several organizations that certify BBQ conceptions but the KCBS is probably the largest.  They started sanctioning kosher competitions about five years ago and about 2 years ago released an official set rules for kosher BBQ competitions.  In kosher BBQ competitions there are generally four categories:

  1. Chicken
  2. Turkey
  3. Beef Ribs
  4. Brisket

There was trimming of meats, mixing of rubs, simmering of sauces, and one or two spills, but it was all good fun. We prepped pretty much everything except the chicken, which we left up to Debbie to do Saturday night. Rachel’s Aunt Sue (pictured below) joined us for the prep and was stuck with the unenviable task of doing the dishes.

After we finished prep we headed to Schnucks, a local grocery with a decent kosher selection, although it pales in comparison to Chicago’s Jewel-Osco.  I was particularly discouraged to find out all their cakes were dairy, as it was Debbie’s birthday and we hoping to bring a pareve (non-dairy) cake to the competition.  As the competition was obviously fleshig (meat), the rules as well as biblical kosher requirements forbid (among other things) the mixing of milk and meat.  We picked up some snacks, beer, and last minute supplies for the competition.

Then it was time for lunch at Gokul Indian restaurant.  Definitely go for the buffet if they are offering it when you visit.  I way over ordered, as I almost never get to eat Indian.  Unfortunately, my family members aren’t as culinarily adventurous as I am, and there are no kosher Indian joints in Chicago.  I ordered the combo appetizer plate of Miorchi Bhajia, Samosa, Bataka Vada, and Vegetable Pakora to split with Elliott, but ended eating most of it myself, followed by the buffet where I had a little bit of everything on the menu, and side of puffy flat bread known as Puri and washed it all down with a mango lassi.  Needless to say, I was stuffed.

I then spend a relaxing Shabbat (sabbath) with the Freund family who were very gracious hosts, proving me with excellent food, company, and some much needed rest ahead of long night of cooking and drinking.  As a bonus, they invited a long time friend of mine, Judy Haber, for lunch.

Right after Shabbat we headed to the competition grounds and to set up.  We needed to build our own tent which was a surprise to me as this was has always been something that was done by organizers in my previous experiences. When you get to a competition, any extra work can throw you off your game when all you want to do is get set up, and start cooking (and drinking).  Lucky our final teammate, Rob Feiger, got there ahead of us and had already put up the tent.

There were a few familiar faces there, including David Horesh and his family who make up team SephardiQ and Mordechai Stricks of team Uncle Mordy and Meatzvah Girls.  A few other teams showed up late, that had not done any prep earlier.  These teams needed to choose their meat, which in a kosher competition is provided by the organizers, but they were a little short on ribs.  At one point, the organizers came around to reclaim one of three racks of ribs they had issued to the teams to redistribute them to the other teams that were shorted.

In order to keep things kosher, most of the kosher competitions supply all needed ingredients and equipment.  This event did provide a grill and a smoker as well as a basic set of culinary tools.  I have to be honest though, the knives were fairly dull and the ingredient pantry was basically non-existent.  I did reach out the organizers ahead of time and learned that it would be slim pickings for supplies so I brought most of what I needed with me from Chicago.

BBQ Ingredients


Mendel Segel
Mendel Segel


Sometime in the early morning hours the wind picked up.  This makes tending the fire a bit tricky, but we managed to keep our temperature fairly stable.  The real problem was the fact that tents, which are essentially giant sails, were fairly light weight and were not sufficiently staked down, and started to fly away.  After the tents to left and the right of me blew over, I got smart and tied mine down to our two tables, which managed to hold it for the remainder of the event.

Rachel and Her Mother


The spectators showed up around 11:00 AM.  The competition sold tasting tickets so the spectators could get a “taste” of the action. I had a fewfriends stop including my co-worker Brian Kinney who was in town visiting his father, my grade school friend Nathan Waldman who moved to St. Louis for college and never left, and Judy Haber’s daughter Aliza, who at one point was Rachel’s roommate. Rachel’s parents also came down, making the drive from Kansas City and bringing bagels.

To be honest all of our food came out mediocre and our scores reflected it.  Our ribs were overcooked, the turkey wasn’t the prettiest, and brisket was a bit tough.  I have tendency to rush and end up slicing my meat a little too early. We ended up placing fifth overall.  All four teams that beat us were more experienced than us, and deserved to beat us.  Of course team RaBBi-Q took top honors.  Only Mendel Segal could roll in late having done no prep and take overall grand champion. Despite a few bumps, all in all it was a great time.

Check out Rachel’s take on the trip here: St. Louis Kosher BBQ Competition Re-cap By Rachel

BBQ Ribs BBQ Turkey BBQ Chicken Brisket

Kosher hot dog stand at Wrigley Field

  • March 21, 1837 – The City of Chicago was founded.
  • October 8, 1871 -The day the Chicago fire was started.
  • April 23, 1914 – The day Wrigley Field opened.
  • November 4, 2016 – The Chicago Cubs win the World Series for the first time in 108 years.
  • July 21, 2017 – The day Certified Kosher food arrived at Wrigley field.

Few things can impact the day people remember so vividly in their lives — like when something epic happens.  Last Friday, Certified Kosher food finally came to Wrigley Field in the form of a Glatt Kosher hot dog stand. Adults raved and kids were excited and yes, some may have even shed a tear or two when they stepped up to the plate to order their kosher food.

There is a lot of excitement about this new venture for both the Cubs and their fans to get certified kosher food in the ball park. From Jews to Muslims (who keep strict Halal), to the health conscience, there is a new kind of dog on the block. With their tasty Romanian hot dogs and spicy Polish sausages, Danzigers will surely have people lining up to get their fill of kosher hot dogs at Wrigley.

Danziger’s kosher hot dog stand is located on the first base side, on top of section 235, in between the last two ramps leading up to the upper deck where the 400-500 sections are located. We are assuming it will be open only 6 days a week and closed for Shabbos with possibly further closings for Jewish holidays. That may change, however, so be sure to check ahead before walking into the stadium.

While still in its infancy, the simple menu consists of a Regular Romanian hot dog or a spicy Polish Sausage – which are reasonably priced compared with other inflated pricing while in the ball park. Looking to pile on a mountain of condiments and build your very own authentic Chicago hot dog? You can get grilled onions for no extra charge or decide to top it off with some mustard and relish packets. There have been some sightings of hot dog sauce (read Ketchup) but we will chuck it up to management’s oversight.

Looking for a quick snack? Be sure to grab a kosher certified pretzel here as it is the only location in the park that is certified kosher – – all other locations are not certified!

The entire kosher community is excited to hear this awesome news. But there is word that Danzigers already has competition as Milt’s food truck will be starting to serve up their famous Arietta pulled rib sandwich, but that will have to wait for another week before we can sample it. Stay tuned for more in a follow up post!

Loaded Jicama Fries Two Ways

After Pesach (AKA Passover) everyone is a little sick of potatoes.  Jicama, a large tuber from Mexico with the texture of a turnip and the flavor of an apple is a great substitute for a potato. You don’t get the same crunch as you do with a fried potato, but it is not bad for an occasional change.   Originally I was going to name this  post Jicama Fry Poutine Two Ways, but the recipes moved too far away from a traditional poutine, which is made with cheese curds and gravy.

Mushroom and Cheese Jicama Fries Jicama Fries with Mushroom Gravy and Cheese Sauce

Kosher cheese curds can be very hard to obtain so in my dairy version I substituted a cheese sauce, and the gravy for a mushroom sauce, to keep it all kosher.


5 from 1 vote
Jicama Fries
Prep Time
5 mins
Cook Time
15 mins
Total Time
20 mins
 

This is a great potato alternative if you want to change it up.  You can try baking them instead of frying, but believe me, it won't be nearly as good.

Course: Side Dish
Cuisine: Mexican, vegan
Servings: 4
Author: Daniel Peikes
Ingredients
  • 1 Large Jicima Cut in to 1/2"X1/2" Fries
  • 3 tbsp Seasoned Salt To taste
  • Vegetable Oil For frying
Instructions
  1. Put a large pot of water over high heat and bring to a boil.  Add the fries and boil for 10 minutes to soften them.

  2. Remove the fries from the water and dry them completely.  A salad spinner works well for this.

  3. Add vegetable oil to your largest, heaviest frying pan so it come 3/4" inch up the side.  If you have a cast iron skillet this would be a great time to break it out.  Put over medium heat.

  4. Once the oil gets to 350°F start adding the fries a few at a time being careful not to crowd the pan.  Fry on each side until golden brown.

  5. Move the fries to a cooling rack, season with the seasoned salt, top with your favorite additions, and serve immediately.

5 from 1 vote
Mushroom Gravy
Prep Time
10 mins
Cook Time
20 mins
Total Time
30 mins
 
Course: Sauce
Cuisine: vegan, vegetarian
Ingredients
  • 1 lb Mushrooms (I like cremini AKA baby bellas, but white buttons will work) Stems removed, rinsed, and sliced
  • 2 large Onions Halved
  • 3 tbsp Butter or Olive Oil
  • 3 tbsp All Purpose Flour
  • 3 Cloves Garlic Finely Chopped
  • Additional Olive Oil for Sauteing
  • 1 tbsp Soy Sauce
  • 1 Cup Vegetable Stock Preferably home made, but store bought will be fine
Instructions
  1. Add a couple of tablespoons olive oil to a large saucepan or a dutch over over medium heat.  Add the mushrooms, being careful not crowd the pan. Work in batches if necessary.  Saute the mushrooms until the are nicely browned on both sides and remove them from the pan.

  2. Add the onion and some olive olive oil if needed.  Saute the onions until they take on a golden color.  Add the soy sauce and the garlic and continue to cook until the garlic just starts to brown.  Then remove the onions and garlic from the pan.

  3. Turn the heat down to low and add the flour and butter or olive oil.  Stir constantly to completely coat the flour particles with the fat.  This is called a roux, it is a great thickener for sauces. 

  4. Stir in the mushrooms, garlic, and onions.  Then slowly add vegetable stock, stirring regularly until the desired thickness is achieved.

  5. Serve immediately on top of fries, knishes, pasta, or chicken, the sky is the limit.

5 from 1 vote
Cheese Sauce
Ingredients
  • 3 tbsp Butter or Olive Oil
  • 3 tbsp All Purpose Flour
  • 1/2 Cup Whole Milk Or Cream
  • 1 Cup Shredded Mozzarella
Instructions
  1. Put sauce pan over low heat and add the flour and butter or olive oil. Stir constantly to completely coat the flour particles with the fat. This is called a roux, it is a great thickener for sauces. 

  2. Continue to stir the roux constantly. Once the roux starts to brown add the milk or cream slowly and continue to stir.

  3. Once the milk or cream is completely incorporated, add the cheese and stir the cheese until it is completely melted.  Serve immediately.

Jicama Fries with Shredded Beef and Spicy Salsa Verde

For my meat version, I wanted to something that would stick the ribs, topped off with some heat.  I happened to have had made some Mexican food recently and thought that this was a great opportunity to use up some leftovers.  Pulled beef is a great opportunity to break out the slow cooker (AKA Crock-Pot), and as Ron Popeil always said, set it and forget it. The ingredients for the salsa are grilled, which is a great way to use up the heat from dying coals after a backyard soiree.

5 from 1 vote
Pulled Beef Jicama Fries
Pulled Beef
Ingredients
  • 1 Hunk of Beef Nothing fancy. Neck or shoulder is fine
  • 1 Bottle Beer
  • 29 oz Can of Tomato Sauce
  • 4 Cloves Garlic Roughly chopped
  • 1 Large Onion Sliced
  • 1 tbsp Dried Oregano
  • Salt and Pepper To taste
Instructions
  1. Throw all the ingredients in the slow cooker (AKA Crock-Pot).  Let it cook for about 6 hours on low.  Shred with two forks.  Serve as a taco, with rice, on fries. or over pasta.  Freezes well.

0 from 0 votes
Pulled Beef Jicama Fries
Spicy Tomatillo Salsa Verde
Prep Time
10 mins
Cook Time
15 mins
Total Time
25 mins
 

This is a great condiment when you want to kick it up a notch.  You can add more or less chili peppers to control the level of heat.  You can also remove the ribs and seeds from the peppers to decrease the heat.

Course: Dip
Cuisine: Mexican
Servings: 8
Author: Daniel Peikes
Ingredients
  • 2 Jalapeno Peppers
  • 2 Poblano Peppers
  • 2 Green Bell Peppers
  • 6 Large Tomatillos Husks removed
  • 1 Large Onion Peeled and roughly chopped
  • 3 Cloves Garlic Skin removed
  • Olive Oil
  • 1 Handful Cilantro Chopped
  • 1 Lime
  • Salt and Pepper to Taste
Instructions
  1. Toss all the peppers, tomatillos, onion, and garlic with the olive oil. Put them on the grill or under the broiler until the skin begins to char and then remove from the heat

  2. Remove the tops from the peppers and add them to a large mixing bowl along with the onion, tomatillos, and garlic.  With an immersion (stick) blender, process until desired texture is achieved. This can also be done in a food processor or a regular blender.

  3. Add the cilantro, salt and pepper and the juice from the lime to bowl.  Stir to combine. Serve alongside chips, or on top of tacos or fries.

Don’t forget to check out Rachel’s Jicama recipe here: Spicy Slaw with Quick Pickled Jicama and Creamy Salsa Verde Dressing

Lamb Bacon Chili Shakshuka With Quail Eggs

Before you ask, yes you can may this with any type of bacon and eggs, it does not need to be lamb bacon or quail eggs.  I happened to have some excellent lamb bacon from CWS Meats and I also managed to find a local small chain grocery store that regularly carries kosher quail eggs.  I figured a kosher bacon and egg change would be a great one for me and Rachel.

Lately it has been wet, cold and gray in Chicago so I was craving something warm and hearty.  As we are getting close to Passover I did not want to buy any new ingredients, so I rummaged through my fridge and came up with this shakshuka recipe.  Shakshuka is generally made by simmering vegetables in a tomato sauce, and then carefully adding whole eggs and cooking they until the whites are set and the yolks are just warmed through.  Chili peppers are often added to the sauce to give it a kick.

This recipe can easily be scaled up and down for more people, or for that matter the size of your pan.  This recipe comes out wonderfully in  cast iron skillet, but a saute pan or a large frying pan will work in a pinch.

Don’t forget to check out Rachel’s dish using the lamb bacon and quail eggs and let us know which you liked better in the comment.  Hers can be found here: Lamb Bacon French Fries topped with Quail Eggs and Chopped Parsley

5 from 1 vote
Lamb Bacon Chili Shakshuka With Quail Eggs
Prep Time
15 mins
Cook Time
30 mins
Total Time
45 mins
 
Course: Main Dish
Cuisine: Mediterranean, Mexican
Servings: 4
Author: Daniel Peikes
Ingredients
  • 6 Slices Lamb, Beef, or Pork Bacon Diced
  • 1/2 lb Ground Beef
  • 1 Medium Onion Diced
  • 6 Medium Mushrooms Sliced
  • 1 Each Red and Green Pepper Diced
  • 15 oz Can of Tomato Sauce
  • 1 Tbsp Italian Seasoning
  • Slices of Pickled Jalapenos For garnish if you like it hot
  • Torilla Chips
Instructions
  1. Put a large saute pan or cast iron skillet over medium heat. Add the bacon and cook until crispy. Remove the bacon, keeping the fat in the pan.
  2. Add the ground beef and cook until completely browned. Remove the ground beef, again leaving the fat in the pan.
  3. Add the onions and cook until the start to brown. Add the peppers and mushrooms and cook until the also start to brown.
  4. Add the tomato sauce, cooked ground beef, and Italian seasoning. Bring to a simmer.
  5. Carefully add the eggs one at a time, being careful not break the yolks. Let the eggs cook in the sauce until the whites are set and the yolks are warm.
  6. Sprinkle on the bacon and garnish with the jalapenos and tortilla chips. Serve immediately.