St. Louis Kosher BBQ Competition Re-cap By Rachel

5 “Dudes” and a Vegetarian (not quite but close enough) wearing our trademark “Meat is murder…tasty, tasty murder” t-shirts!

Well, it’s been 2 weeks since competing in our first kosher bbq competition of the season, and life is finally back to normal (and I’m pretty sure we got all of the bbq stink out of everything).  Our team “5 Dudes and a Vegetarian” (Daniel Peikes, Elliott Fliegelman, Debbie Burg, Robert Feiger and me), competed in the second annual St. Louis Kosher BBQ competition on June 26th! Maybe you caught our Facebook live, as Daniel Peikes, our fearless pitmaster, slathered the base rub (made by yours truly) all over the giant hunk of brisket! Well, if you missed it, be sure to check out our “Meat Your Vegetables” Facebook page!  And in case it wasn’t that obvious, yes I’M the vegetarian on the team.  It definitely gets a lot of laughs and no, I don’t make “vegetarian” food for the judges.  Because that’s not allowed. 🙂  More on that later…

But first, let’s talk Indian food! That’s right…kosher Indian in St. Louis! Stopped there for lunch with (most) of our team to enjoy a relaxing, supper yummy meal at Gokul restaurant on Friday, after the prep.  A cute place with funky colors yet a calming atmosphere, the menu seemed a little overwhelming to me, so I opted for the buffet instead.  Everything was delicious – from the herbed rice, to the vegetable korma (mixed veggies with cashews and raisins in a creamy tomato sauce) to the super spicy spinach and mushroom sauce and beans and lentils cooked with mild Indian spices.  No naan or paneer for me…but it was tasty and full of flavor and spice.

And now, back to our regularly scheduled programming.

For those of you who haven’t experienced the joy of kosher BBQ competitions, here’s a little rundown.

The competition has an entrance fee – anywhere between $350 – $400.  That amount includes all of the protein (typically brisket, ribs, chicken and turkey), the spices and ingredients provided by the competition (like salt, pepper, garlic powder, onion powder, apple juice, olive oil, ketchup, etc…), equipment like knives, cutting boards, tongs, heat-proof gloves, thermometers, AND of course, the smoker and the grill.  So, yes, you are able to bring in other ingredients, as long as they are brand new, sealed and of course they have to be labeled kosher.  Typically, the prep happens either Thursday night or Friday (as the cooking gets underway Saturday night, for a Sunday event).  The prep for our team?  Well, for St. Louis specifically, I made all of the rubs – the base rub, which then was used to make the rub for the brisket, ribs, and turkey (our teammate Debbie, had her own special recipe for the chicken).  I also made the injections (I know, sounds so dirty, right?  Or maybe it sounds medicinal, but whatever the case, yes, I make sauces to then have injected into the meat.  Oh baby).  Meanwhile, Daniel is trimming the fat off the brisket and prepping the ribs.  Debbie is making her sauces, while my husband was the gopher (he’s not allowed in the kitchen, especially with knives). 🙂  Okay, just kidding Ellie!  My aunt who lives in St. Louis also came by to check out our prep and she volunteered to be our dishwasher – such a big help, thank you aunt Sue!

Okay, so by Friday late morning, all of the prep is done.  Saturday night, right after Shabbat, we head over to the shul where the event was happening, get our tent (thanks to our teammate Rob for getting us set up), grab our tables and start rolling.  Rubbing the brisket and getting that baby on the smoker at some point during the night. 🙂  That’s the key here – we stay up ALL NIGHT and essentially babysit the brisket on the smoker.  You really need to keep an eye on that temperature – that can really make or break it!

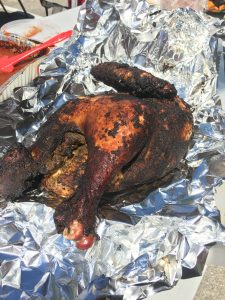
Fast forward to Noon on Sunday – the competition BEGINS!  Chicken turn-in to the judges is first, followed by ribs, turkey and brisket.  And because this competition is a KCBS sanctioned competition (Kansas City Barbecue Society – yes it’s a real thing, and it’s 2 legit 2 quit, HA), there are MANY rules that are specified through KCBS, rules like no garnish, and sauces with no chunks bigger than a fine dice – are the real deal.  That’s right.  No sprigs of parsley in our turn-in boxes!  Just the meat, in all its smoky glory.

Judging underway, and winners announced at 2:30.  We’re tired, exhausted, sweaty (and reeking of smoke) and most definitely dehydrated – let’s get this thing started.  So, we came in 4th place in ribs, 5th place in brisket, and 5th place overall.  And out of only 10 teams, I was hoping we’d inch out by a wee bit more, but hey, it’s good practice, good experience and it just keeps us fired up for the next one.  What I really love about competing in these events is the camaraderie and the great sportsmanship from everyone!  We compete against novices and professionals, but at the end of the day, no one is here to sabotage one another – everyone helps each other out when needed, like borrowing ingredients, equipment, keeping an eye on other teams smokers and alerting them if they get too hot – we’re all here to win of course, but we’re all here to have fun and enjoy ourselves.

Next on our BBQ competition road trip?  Kansas City in September…here we come!


Check out some highlights from the big event!

Vegetable Korma + delish Indian yumminess = HEAVEN


Ellie, did you enjoy lunch? 🙂


Picture of a picture


Sunday morning breakfast – meat ends, bfast sausage, and my homemade Shakshuka along with Debbie’s homemade mini pitot!


5th place winning brisket and burnt ends!


Savory smoked turkey


Sweet ‘n smoky ribs (sorry the chicken didn’t make it into the photos)!

Check out Daniel’s take on the trip: Recap of the 2nd Annual St. Louis Kosher BBQ Competition

Light and Easy Shavuot Menu

Well, Shavuot is HERE! Starting in just a few hours, to be exact.  Ah, the holiday of cheesecakes.  People usually assume that Shavuot is MY holiday because I don’t eat meat, but I wouldn’t be a true Ashkenazic Jew without a little bit of lactose-intolerance, am I right, or am I right? 🙂  Therefore…I’m going with a more light menu.  Something a little healthier and easier on the tummy.  But if you’re all in for dairy-laden cheesecakes and lasagnas, then be my guest.

For the main event…Mini Socca Pizzas!  Um, excuse me?

Yes, soccas.  They hail from the Provence region of France.  I’m so fancy, I know.  I came across an old issue of InStyle, featuring recipes from lifestyle guru and actress Gwyneth Paltrow.  She featured these super easy-to-make soccas, so I’m doing my own spin on them!  All it requires is chick pea flour, water, a little olive oil and salt.  You can find the full recipe, along with some other entertaining tips here.  And since I typically try to avoid gluten, sugar and dairy, this seemed like a perfect way to have some fun in the kitchen and experiment with my mini socca trio toppings!

And since soccas are so easy to make, you can make a whole bunch of them, big or mini, pop them in a plastic bag and freeze them – it’s easy to keep on hand in case you need a quick dinner.  Just top with salad, veggies, or tomato sauce and cheese and dinner is ready in a flash.

Yes, I’m shamelessly plugging my “other” blog Riskyveggie.com for my other dishes for this Shavuot menu, so check it out and let me know what you think!  And have a chag sameach!

Shavuot Menu:

Sweet potato goat cheese popovers

Caramelized onion dip

Strawberry spinach salad with pecans, onions & feta

Mini Socca Trio:

  • Goat cheese, smoked salmon, fresh chives and dill
  • Spicy roasted garlic tomato sauce, zucchini ribbons, capers, fresh basil
  • Creamy mushroom ragout with black garlic, coconut milk, sliced radish and cilantro

And last but not least…

Dessert:

Chocolate Coconut Lime Pie – from one of my fav bloggers/cookbook authors, Elizabeth Nyland of GuiltyKitchen.com (this recipe is next on my list to re-create). YUM!

Spicy Slaw with Pickled Jicama and Creamy Salsa Verde Dressing

Welcome back from the Passover craziness! It feels like the Seder meals were forever ago, am I right?  Well, back to the swing of things, and this latest challenge ingredient is “Jicama”, also commonly known as a Mexican turnip.  I think it tastes somewhere in between an apple and a potato.  I love the versatility of the humble jicama – you can eat it raw or cooked and it’s such a neutral base, it’s good in so many dishes.

I had a few dishes running around in my head and tested a few things out, but what I started with was a quick pickled jicama – let that sit in the fridge for a day or so until I figured out my next move.  Just apple cider vinegar, water, salt and coconut sugar (since, if you know me, I don’t even have white sugar in my pantry.  I know, I know…I’m one of “those” people).  Diced it up, poured the brine in a mason jar and let it do its job.  Then, it was on to some inspiration.

Over Pesach, my mother-in-law showed me a new cookbook she got, “Perfect for Pesach” by Naomi Nachman.  Truth is, this is basically what I eat all year-long!  Gluten free, but definitely still delicious, I mean, who are we kidding.  I was really digging it, so I got a copy for myself (can one have too many cookbooks?  I think not)!  I came across a coleslaw with chimichurri and that got me thinking about my jicama dish.  But immediately, my mind went to salsa verde (green salsa). So, I got some tomatillos (they look like green tomatoes with a papery skin on the outside), some jalapeno AND Serrano peppers  (because you know, I live on the edge – maybe that’s another reason why I’m “risky” veggie, aye?), some green onions, garlic, olive oil, sat and pepper.  Broil for about 10 minutes until everything is slightly charred and piping hot and now you have a sudden craving for chips and dip.  Blend it all in a food processor and BAM.  Salsa verde.  I’ll warn you, it does have quite a kick, but you can always remove the ribs and seeds of the peppers before blending away.  But I like it spicy baby!

So that’s that!  I mixed some bagged coleslaw (because I’m not afraid of using shortcuts), sliced radish, pickled jicama, and fresh cilantro (and if I COULD, I would sprinkle cilantro on freaking everything – yea, I’m one of those weirdos that somehow doesn’t think it tastes like soap).  And to mellow out the heat of the salsa verde, I mixed in some homemade mayo, but you can always use store-bought, don’t worry, your secret’s safe with me. 🙂

Fresh, light, spicy, crunchy – now THAT sounds like a perfect spring dish if you ask me.  I served this slaw as a side dish to my Moroccan salmon and carrots – look for that recipe coming soon on my other blog, riskyveggie!Jicama Slaw Menu

And coming up…my light take on Shavuous food!  (say WHAAA?)


Don’t forget to check out Daniel’s Jicama recipe: Loaded Jicama Fries Two Ways


Minestrone Soup with Gluten-Free Matzah Balls

Ah, the dreaded “P” word.  The word that we Jews cringe when anyone utters it before Purim. Yes, I’m referring to “Pesach”!  HA!  It’s not that overwhelming, is it?  (Insert shoulder shrug emoji here).  And so it begins. Searching, sweeping, and cleaning out old, weird stuff from the fridge (you know, the stuff you forgot to label, some unidentifiable mushy substance that now has a fresh layer of fuzzy mold?)  Alright, enough of the gross stuff. You are reading about food here anyway.

Quick disclaimer:  Some of you may notice that I have included peas in this recipe.  Peas are “kitnoyit” and only eaten by Sephardic Jews on Passover, so if you’re Ashkenazic, then peas are off limits.  So feel free to omit, if it applies to you.

So this week’s challenge is none other than the traditional “matzah ball” (or matzo ball as it’s most commonly spelled).  Being, well, me…I wanted to take on the challenge to make mine gluten free, and before you get all annoyed with me that I may not making true matzo balls, here me out for a second. Call them whatever you want, but basically these are big gnocchi, and trust me…they turned out pretty delicious if I say so myself.  So no haters here…just wanted to try something different while still appealing to everyone.  I must admit, I had to do some research here.  Survey says – use potatoes as the base.  I went with yukon gold potatoes, mostly because I like the flavor, and when they cook, they get this super creamy consistency that I don’t think you can really get from a big baking potato, and no peeler necessary (though honestly, I hardly ever peel potatoes). The other thing I realized while doing some searching on the interwebs, is that you MUST wait for the potatoes to cool before making the dough (so, insert extra prep time for that).  I didn’t ask questions, I just followed along.

Then came the hard part – what type of soup would I make?  I briefly thought about “tortilla soup”, sans tortillas, but using the matzah balls as a replacement, but my gut told me to go with a simple minestrone.  It’s a week before Passover and aren’t we all trying to get rid of random items in our fridge?  Many of us probably have canned tomatoes, onions, garlic, carrots, frozen peas, right?  This is basically a “dump soup” as I like to call them – just dump everything into a pot and call it a day.  That’s the beauty about making soup, you can throw in whatever you want and adjust seasonings as you go, it’s almost fool-proof.  Plus…since these matzah balls are basically gnocchi, why not make an Italian-influenced soup, right?  I’m not trying to change the world here with my out-of-the-box and totally inaccessible recipes that no one will make it.

Before I go, I have 2 tips for you (and one bonus tip in the recipe below), because you KNOW I’m all about handy tips, ya!  So I used a can of whole peeled tomatoes for this and I happen to love these vintage-looking cans, so don’t throw them out (or recycle for that matter), instead use it as a low vase for flowers!

Tip number 2?  I made veggie stock a few months ago and froze it in ice cube trays (I have a few weirdly shaped ones, some heart-shaped, some stick-shaped, but who cares), then instead of buying veggie stock for this soup, I just popped in a few veggie stock cubes and you’re done.  I kinda eyeballed the measurements, but feel free to play with it as you make it!  I added a lot of water and stock because I didn’t want it to end up being tomato sauce.  So start with some water and you can always add more.  Don’t have stock around?  That’s fine too, just add enough after and make sure you season with plenty of salt, pepper, and whatever else you have on hand.  The sky’s the limit!  Don’t have peas?  Throw in some sliced button mushrooms!  Make it your own!

One other thing to add.  If you’re like me and want to multi-task, let your slow cooker be your friend in this scenario!  I didn’t want to babysit my soup, so instead I dumped everything into my crock-pot, and cooked it on low overnight.  I made this for Friday night dinner, so all I had to do was put it back on the crock pot and re-heat it.  Don’t you love when your kitchen appliances can do the work for you?  But obviously you can make it the old fashioned way too.

So that’s it, here we go!  1 week and counting.  Wishing you all a chag kasher v’sameach and a wonderful Pesach with family, friends and hopefully LOTS of good food.  🙂

Let me know what you think of the recipe in the comments.  Also, let me know if you like my matzo ball soup or Daniel’s better.  You can find hers here: Traditional Chicken Soup With (Kosher) Bacon Schmaltz Matzo Balls

5 from 1 vote
Minestrone Soup with Gluten Free Matzah Balls
Prep Time
1 hr
Cook Time
2 hrs
Total Time
3 hrs


Course: Soup
Cuisine: Homemade, Italian, Jewish, Kosher
Servings: 8 people
Author: Rachel Katzman
Ingredients
Gluten Free Matzah Balls
  • 7 small-medium yukon gold potatoes baked and cooled
  • 2 cups almond flour
  • 2 cups potato starch
  • 3 eggs
  • 2 tsp salt
  • 2 tsp pepper
  • 2 tsp fresh dill
  • 2 tsp garlic powder I roasted some garlic with the potatoes and I added the garlic to the soup, but you can use garlic powder, that's totally ok 🙂
Minestrone Soup
  • 1 28 oz can of whole peeled tomatoes
  • 2 small white onions, chopped into large pieces
  • 1 10 oz bag of frozen green peas
  • 1 10 oz bag of frozen carrots yea, I was feeling pretty lazy here, just being honest.
  • 3 stalks celery, chopped optional (I didn't use any because I just used up whatever I had in the house)
  • 1 cup button mushrooms, sliced also optional,
  • 1 tsp extra virgin olive oil
  • 3 cloves garlic, minced
  • 2 cups veggie stock
  • 3 cups water
Instructions
  1. Make the soup - in a large soup pot, sweat the onions, garlic, celery (if using) carrots and mushrooms (if using) for about 10 minutes, season with salt and pepper.

  2. Open the can of whole peeled tomatoes and carefully (wearing an apron is a must here), use your hands to crush the tomatoes while in the can, so they're not quite as "whole" but a little more rustic.  

  3. Add in the can of tomatoes, frozen peas, stock, water and any other spices or seasonings (thyme, bay leaf, dried basil)

  4. Turn the stove to high and cook until the soup is boiling, then turn down the simmer, cover and cook for another 30 minutes, stirring occasionally.

  5. While the soup is cooking, add the matzah balls ingredients to a food processor and blend until smooth.  You may have to add in a little more flour if the dough is still too sticky but depends on how starchy your potatoes are, or if you're using extra large eggs.  Knead the dough in a big stainless steel bowl until you get the perfect consistency (you want to be able to roll them in your hands, so not too sticky but sticky enough that they hold together).

  6. Fill a second soup pot with water and bring to a boil.

  7. (Tip #3):  Use a mini ice cream scoop to portion out the matzah ball dough and drop in to the boiling water.  

  8. Cook for a few minutes, until the balls float to the top.

  9. Remove the matzah balls with a slotted spoon and drop them into the minestrone soup to finish cooking. 

  10. Serve the soup piping hot with fresh basil or dill and enjoy!


Recap: 2017 International Home + Housewares Show!

Chef Ming Tsai and his “fangirl”

Well, it’s Monday and my feet, legs, shoulders, back (ok, basically all of me) is sore, my Fitbit tracked over 24,000 steps, almost 10 miles and on my feet for 9+ hours all yesterday.  That must mean one thing – the International Home and Housewares show was yesterday! And no, I did not exaggerate those numbers. As their website claims: “Where art intersects with engineering. Where technology informs style. Where exhibitors display innovation, buyers discover trends & the industry connects to do business. It’s just plain smart.  In addition to more than 2,100 exhibitors showcasing thousands of new products, the International Home + Housewares Show offers visitors education and insight into business practices and trends that are shaping the industry. Experience the Show’s strong educational sessions and special displays to help grow your business!”

Smart, yes.  Exhausting, absolutely.

Here’s the scoop.  Daniel and I registered a few months ago (well, I also registered under my other blog Risky Veggie).  The 3 of us (my husband included), left at 8 a.m. on Sunday, arrived just before 9, after winding our way through some random outdoor parking lot that seemed miles away from McCormick place.  We started on one side, walking up and down each aisle, checking out products and booths – everything from Black + Decker to SodaStream, Vitamix, Nest, Cuisinart, and Keurig and checking out every type of pressure cooker from every company you can think of. 🙂  Luckily there were many raffles to win a pressure cooker, so of course I entered every single one (this is next on my list of kitchen appliances).

We got a hugger! 🙂
Goofing around with Jeff Mauro, the Sandwich King


Action shot!


First on this side of the exhibit, was walking over to the cooking demo featuring Food Network chef Jeff Mauro (a.k.a. “The Sandwich King) – a local Chicago boy, he won “Food Network Star” a few seasons back.  He was demoing Chicago-style Philly cheesesteak and sweet potato hash, using the new George Foreman grill, with removable plates for waffle-making, braising, broiling, searing and of course grilling. So, naturally, he heckled Daniel and me in the front row, while we took action shots and heckled him back.  He was super friendly and so silly (case in point, my “silly pictures” I took with him).  I gave him both of my business cards and off we went.  Meanwhile, my husband Elliott was off at the Wahl exhibit getting a free haircut and beard trim (this barber, Ben is THE BEST.  If only he had a barber shop near us).  Yay for free haircuts!

Continuing on, chatting with some vendors, ooing and ahing over the fancy displays, getting free bottles of personalized SodaStream drinks (and may I say, their new all-natural and totally sugar-free flavors are pretty good) and… how could I forget? Daniel and I purchased our own portable commercial induction cook top with temperature control, at a CRAZY low price (um, think under $150).  Yup, exactly.

Next, I stumbled upon the Aroma booth and low and behold, Chef Ming Tsai was there doing a cooking demo with their new fancy schmancy pressure cookers (see, I told you). He made 3 dishes – seared beef with rice and watercress, Chinese duck (I left during this demo and came back) and…Dunkin Hines cake.  Yes, it’s true. He was demonstrating how easy it is too make cake in this pressure cooker.  Since I was standing in the front row (why was everyone shying away in the back?), he asked me to be his volunteer, to show everyone how easy it is to use.  The only hiccup was that he forgot to plug it in (cue my deer in headlights face). Okay, all is good.  Photo taken with him, and mentioned that I met him at a book signing years ago downtown, gave him my cards (of course) and again, away we went.

More walking.  Feet getting a little tired by now. Lunch (I brought my own Rachel-friendly food).

Swoon

Time for the South side hall.  I saw that Iron Chef Geoffrey Zakarian was going to be there doing a demo, but I waited around and didn’t see him around, so instead, we all head to the Cooking Theater to see the one and only Fabio Viviani for his cooking demos (you may remember him from Top Chef, where he made “It’s Top Chef, not Top Scallops” a famous line and me, being the weirdo I am, quoted it to him last year.  He laughed).  He got a volunteer from the crowd to help him make fresh pasta – orecchiette, to be exact, and Chicken and Cauliflower steak puttanesca, all while chucking balls of pasta dough into the crowd, because, he’s Fabio. 🙂

Chef Fabio Viviani signing last year’s photo

Wasting no time, I rushed up to the front, asked for a quick photo and (since I came prepared and printed out the photos of the celeb chefs and me from last year), I had him sign my photo of us.  Yea, I’m weird like that (but in my defense, Daniel did that too and gave me the idea of printing out those photos).

2016 IHHS


More walking, more free swag, more business cards exchanged, more contacts being made.  “I’d love to write a review on my blog about your product”, and “where do you sell these in retail” where the common lines that I felt myself repeating all day.

Caught a quick glimpse of Chef Emeril Lagasse at his booth but he was talking with his PR people and heading back to the other wing for an autograph signing.

North side was next.  This is the cleaning, organizing, start-up companies, or some you’ve seen on Shark Tank stuff (i.e. Squatty Potty, Scrub Daddy, DBest), among other big companies like Ziploc, Kate Spade, Clorox and Igloo. I chatted with a few companies who were so excited to give me extra products to try out and review (hair clips, mason jar lids, cookie cutters, and cleaning cloths, just to name a few). A few more cards given out and carrying 3 heavy bags of stuff, it was 5:15 and time to head out.

“Party Bar” from Igloo
“Trailmate” from Igloo

All in all, a great show.  Last year when I went for the first time, I was just getting up and running as a blogger, and now I have not one, but TWO blogs!

I’m always on the lookout for interesting designs, new products – everything from kitchen appliances, home decor, storage, food prep, cleaning products and everything in between. I feel much more prepared now for these types of shows, more business cards to hand out and the best questions to ask “show me about your product” and “what new products are you showcasing?”

Ergo knives!

The trade show is well organized and some company booths are displayed so impressively, so chic, I wish my living room could look that put together (ok maybe it is), but mostly, I coveted those fancy tablescapes. 🙂 And maybe the baby blue vintage-style toasters.  Or the giant copper pots.

Time to register for 2018!

Don’t forget to check out Daniel’s review of the show here: 2017 International Home + Housewares Show Review

Happy Pi Day! Chocolate Sweet Potato Pudding Pie with Maple Coconut Cream

Happy Pi Day everyone!  Ah, March 14th, 3/14, where everyone stuffs their faces with pie (much more tasty than pi).  Math nerds, unite!  This latest challenge is none other than (duh)…PIE!  #yum.

Funny, I almost forgot about “pi” day this year, until my chiropractor’s office provided a gentle reminder of their annual “pie contest” on pi day of course (shout out to my peeps at Chiro One)!  I mean, doesn’t this just make for a perfect blog post?  Although it was a wee bit quick after Purim to make something new for this blog, yet again, I did remind Daniel that he didn’t have to re-invent the wheel with this one (and of course, we want to give you all some fresh new content).  “How about using some of your leftover BBQ chicken from your hamantaschen, or the smoked duck from the seudah, and making a pot pie?” But who am I kidding…would there actually BE leftovers?  (In case you’re wondering, yes, there were, let’s be honest, he did make 4 different proteins for like 5 meat-eating adults).

In any case, I got right to work on my pie.  I figured Peikes would make a savory pie (and boy was I right), but for this I wanted to go back to the basics – homemade coffee date nut crust, cocoa powder, sweet potato (your kids will NEVER know they’re eating sweet potato in this), chia seeds for that extra nutrition boost and all around yumminess.  This concoction was mostly a thought of “ok, what do I have in my pantry that I can work on getting rid of, because Pesach is around the corner?”  I ended up with canned organic pureed sweet potatoes (um, super easy and takes way less time than baking your own), raw cocoa powder, and some other yummy ingredients that you’ll see if you take a look at my recipe below. Oh and feel free to use whatever crust you want.  I happened to be making a big batch of my famous coffee coconut date balls (for a friend who had a baby and for a soon-to-be-mom at work), soI ended up using some leftover “date ball” mix for my piecrust. Yea…multitask for the win here. It’s easy to whip together in a food processor, plus it’s gluten free, vegan, soy free, dairy free and sugar free (but NOT taste free). 🙂

Wondering how I made the whipped coconut cream?  Thinking it’s going to be super difficult? Well, fear not my friends because this is the easiest homemade whipped cream (and healthiest) topping ever.  Step 1 – place 2 cans (1 can isn’t quite enough for this pie) of full fat coconut milk in the fridge. Step 2 – remove the cans and carefully remove the coconut cream that has risen and hardened at the top (save the coconut milk for another use).  Step 3 – place in bowl, add maple syrup and mix until fluffy peaks of creamy whipped topping are born (just FYI, it won’t be “exactly” like real whipped cream, so just note that, but it’s close enough, and oh yea, it tastes good too).  Step 4 – shmear on top of pie.  Step 5 – (cool in fridge and then), DEVOUR.  The yummiest part of this pie, in my opinion?  The coffee in the crust!

So that’s it my friends!  My pie for pi day.

Disclaimer: I do not take any responsibility for any extra weight gain on this day, from eating lots and lots o’ pie.

Comment below and let me know how your pie turned out! Also, let me know if you liked my recipe or Daniel’s better.  You can find his here: Happy Pi Day: Smoked Duck Personal Pot Pie

5 from 1 vote
Chocolate Sweet Potato Pudding Pie with Maple Coconut Cream
Prep Time
30 mins
Total Time
4 hrs 30 mins
 
Servings: 1 pie
Author: Rachel Katzman
Ingredients
  • 1/2 cup dates I like deglet noor, I just like the texture of them, and I don't have to remove the pits, WOOT
  • 1/2 cup nuts I like pecans, but for this one I used walnuts, because I was out, but use whatever you have on hand
  • 4 T almond milk I like the Califia Farms brand
  • 1 dash cinnamon
  • 1 T good quality ground coffee
  • 1 15 oz can organic pureed sweet potatoes
  • 1/4 cup organic coconut sugar
  • 2 T pure maple syrup
  • 1/4 cup raw cocoa powder
  • 1 t vanilla extract
  • 1/4 t cinnamon
  • 1/4 t pumpkin pie spice cinnamon, nutmeg, clove, allspice - or just use any of these spices you have on hand
  • 1/4 cup almond milk
  • 1/4 cup white chia seeds (this is my secret ingredient, instead of using other thickeners, I use chia seeds - they are a perfect thickener and you won't taste them at all, plus they're a great source of protein, omega-3's and antioxidants)
  • 2 cans Full-fat coconut milk
  • 2-4 T pure maple syrup Add in 1 tablespoon at a time and adjust sweetness as needed
Instructions
  1. Make the crust: add the first 5 ingredients into a food processor and mix until fully incorporated (here's the deal - I don't really measure when I make the crust, but I adjust if I need to - it the crust is too sticky, add in a handful of nuts, if it's too dry, add in a few more dates and some more almond milk. If you don't want coffee in it, omit it, or use leftover brewed coffee from earlier that morning).
  2. Grease a 9-inch pie plate with coconut oil.
  3. Press the crust and use your hands and fingers to press it in the bottom and up the sides.
  4. Place the crust in the freezer while you make the filling.
  5. Place the rest of the ingredients into a high-speed blender (to grind the chia seeds) until thickened. Pour into crust and place in fridge for 4 hours or until completely firm in the middle. Place a can of full fat coconut milk in the fridge while the pie is chilling.
  6. After a few hours, remove the can of coconut milk from the fridge, and very carefully, open the top and scoop out the solidified cream (save the milk for a later use).
  7. Place the cream in a stainless steel bowl and using either a hand mixer or stand mixer, whip the coconut cream for a minute or so, and slowly add in the maple syrup, one tablespoon at a time (you can always add more sweetness). Whip until the maple syrup is incorporated and the cream gets a bit fluffy (it won't become the exact texture of whipped cream, but close). Add to the top of the pie and place in fridge to firm up.
  8. Serve chilled - ENJOY!


Purim Seudah Menu – the Rachel way

Hi all and happy Purim!

Even though Daniel and I just made our hamantaschen and posted about it this week, I still cannot believe that we’re in March, and even though Pesach is around the corner, I’m still in denial that it’ll be here before you can say “gluten free hamantaschen”.

So here we go – it’s seudah time!  We’re each giving you some ideas of what to serve at your seudah, and here’s mine!

Appetizer:

My caramelized onion, mushroom, fig and goat cheese GF pizza crust hamantaschen (omit the goat cheese if you’re doing a pareve or fleishig seudah).

Main Dishes:

Super Spicy Drunken Noodles

Raw Falafel Balls with lemon za’atar dipping sauce

Cauliflower Tabbouleh

Dessert:

My coffee maple date hamantaschen with lemon blueberry chia filling

When I first thought of “Purim” food (ok, besides the obvious hamantaschen), I immediately thought of “drunken noodles”.  I mean, clearly, for the whole Purim theme and all, BUT here’s the kicker – there is not one trace of alcohol in this dish!  The whole point of making drunken noodles is that it’s so fiery hot that you’ll want to drink a vat of alcohol (which I do not recommend, for that matter) after eating this super spicy dish.  Or may I just recommend a nice tall glass of…almond milk to wash it down? 🙂 Only I would say that, right?  This dish is typically made with Asian ingredients, but I would use gluten free brown rice pasta (Jovial brand is my fav – holy delicious batman, it tastes just like the real thing), and add some aromatic spices to the mix, to make it unique.  Some cumin, coriander, curry (or whatever, throw in whatever spices and herbs you like), add in some Thai chilies, sriracha, sambal olek (Asian chili sauce), umeboshi plum vinegar (which I’m a little obsessed with, it has a salty, umami flavor that would be spot on in this), and top with some fresh cilantro and plenty of fresh limes wedges to squeeze over the top and this is one dish worth salivating over.

But after that, I was stuck.  What else would be great to serve for a Purim seudah, without being too cliche or specific to one cuisine?  Then it hit me.  Persian flavors (DUH).  Hello, Rachel, the whole story of Purim happens in Persia.  So, I went with some Middle Eastern flavors (which I did with the noodles, image that), with some Rachel flair of course.  The raw falafel bites is an idea that I borrowed from one of my favorite cookbook authors and bloggers, Megan Gilmore, a.k.a. Detoxinista, and I love that these are raw – so no baking required and they only take a few minutes to whip up in the food processor.  Walnuts, tahini, garlic, cumin, lemon juice, parsley – done.  If you want to add chick peas, by all means, but I wanted to do something a little unexpected, and the walnuts give it a nice texture.  If you want to flatten them and pan fry them into patties, then go for it!  Make sure you experiment with your food, the way YOU like it – after all, you’re the one that has to eat it anyway, right? Serve these up in pita (gluten free or not), or lettuce cups and top with some zesty lemon za’atar sauce.  Just mix in some mayo (homemade is super easy to make, or just use whatever you have on hand), add in some lemon zest and juice, chopped parsley, garlic powder and za’atar seasoning and mix!  Done and done.

And last on the list was the cauliflower tabbouleh.  If you’ve checked out my other blog, riskyveggie.com, you’ll note that I am slightly obsessed with the ever popular cauliflower “rice” – just raw cauliflower chopped into rice-sized pieces.  I love a good tabbouleh – that fresh bite of tomato, cucumber, sharp raw onion, fresh parsley and a refreshing finish of lemon juice (ok now I’m making myself hungry), but instead of bulgar or even a gluten free grain, how about cauliflower rice!  It resembles similar texture and it cooks in half the time!  I just like to throw it in a pan with a little olive oil, salt and pepper for maybe 5-10 minutes at max, otherwise it’ll get mushy and I like my cauliflower ‘al dente’.

So that’s the whole megillah, folks (I know, I couldn’t resist).

Hope you enjoy my menu ideas for a Purim seudah!

Freilichin Purim!

Not one, but TWO healthy Hamantaschen!

Okay, so I’m a bit of an overachiever, and for this Hamantaschen challenge, I decided to make not just one type of “hummy” but TWO freaking recipes.  Sweet and savory.  I know it looks like a potchke, but I promise that I’ve given you some helpful shortcuts to make these easier than they look!

For the savory one, I used Simple Mills brand gluten free pizza dough mix (yes, you read that correctly – gluten free). For the filling, I made a caramelized onion, mushroom, fig and goat cheese mixture, with some spices to round it out but I like the contrast of the sweet figs and onions and umami mushrooms (I used oyster mushrooms for this, but use whatever you have on hand). To be honest, I was slightly panicked when I realized I didn’t have any dried figs in my pantry, but to my surprise, I found Trader Joe’s California green figs in my freezer (and perfect timing to clean out my freezer right before Pesach anyway).  So that’s what I used, but if you’re using dried figs, I would put them in some warm water to soften them up before you saute with the rest of the ingredients.

And for the sweet one – here’s the kicker for this, it’s NO BAKE!  Did I hook you guys up or what?  It’s a coffee maple date “dough” with lemon blueberry chia filling! Truth be told, I played around with the dough for a while on this one, adding liquid when needed to make it a little more pliable, but that’s kind of the beauty of this, there’s not really an exact science to it, no precise measuring, just throw some stuff in a food processor and adjust as needed.

So readers, there you have it!  My take on this year’s hamantaschen.

Freilichin Purim everyone!

5 from 2 votes
Caramelized onion, mushroom, fig & goat cheese hamantaschen (GF)
Prep Time
25 mins
Cook Time
15 mins
Total Time
40 mins
 
Course: Appetizer
Servings: 8 medium hamantaschen
Author: Rachel Katzman
Ingredients
  • 1 box gluten free pizza dough mix I like the brand Simple Mills - you just add water, oil and apple cider vinegar
  • 1/2 cup chopped onion Use any type of onion you have
  • 1/2 cup mushrooms (wiped clean with dish towel) Again, use whatever you have (I used oyster mushrooms, but any type will work)
  • 1/4 cup figs Use fresh or frozen, but if using dried, soak them in warm water to soften first
  • 1 small handful crumbled goat cheese I just eyeballed this, about 10 crumbles
  • 1 tsp salt
  • 1 tsp pepper
  • 1 tsp 21 seasoning salute I get this at Trader Joe's - it's a fantastic mix of all different herbs and spices and perfect for savory foods like this!
  • 1 tsp unrefined coconut oil
Instructions
  1. Follow the instructions on the back of the gluten free pizza dough mix - set aside.
  2. Melt the coconut oil in a saute pan and add onions, mushrooms, figs, salt, pepper and spices. Cook for about 15 minutes until fragrant and caramelized.
  3. Add in the crumbled goat cheese and cook for 5 more minutes until melted.
  4. While the goat cheese is melting, pre-heat oven to 350F and place parchment paper on baking sheet.
  5. Wet hands and scoop a golf ball sized amount of dough, flatten into circle, scoop a small amount of filling and fold in the corners to make a triangular shape. You may have to re-wet your hands for this part, so you can seal the corners and the sides, since the dough may crack a bit.
  6. Bake for 12-15 minutes until golden brown.
  7. Top with fresh or dried rosemary. Serve warm or room temp and devour!
5 from 1 vote
Coffee maple date hamantaschen with lemon blueberry chia filling
Prep Time
30 mins
Cook Time
25 mins
Total Time
1 hr 55 mins
 
Course: Appetizer
Servings: 10 hamantaschen
Author: Rachel Katzman
Ingredients
  • 3/4 cup dates I like to use Deglet Noor, I just like the texture better and you don't have to remove the pits, like Medjool
  • 3/4 cup nuts I like to use pecans for this, but almonds or walnuts would be great too
  • 3 T pure maple syrup
  • 1 T ground coffee You can use either leftover coffee, or good quality granules
  • 1/2 cup almond milk or any other dairy-free milk you have handy
  • 1 tsp vanilla extract
  • 3 T shredded coconut
  • 2 cups fresh or frozen blueberries
  • Zest and juice of 1 lemon
  • 3 T white chia seeds
  • 1/2 cup coconut sugar
  • 1 T unrefined coconut oil
Instructions
  1. Melt the coconut oil in a pot and add the blueberries, coconut sugar, lemon zest and juice and cook until the blueberries have all popped and mixture has thickened.
  2. Turn off the heat and add the chia seeds and mix well until the filling is thick, like jam.
  3. Add the dates, nuts, maple syrup, coffee, almond milk, vanilla extract and shredded coconut into a food processor and pulse until all combined. Once it's all blended, remove the lid and scoop out some dough to see if it'll hold together when you fold it into hamantaschen. You may need to add some almond milk or water, or more nuts depending on the consistency.
  4. Scoop some dough onto a baking sheet covered in wax paper, and flatten into a circle. Add a small amount of filling and carefully fold up the sides to make a triangular shape. You may need to wet your hands for this one to press down the sides and corners. Sprinkle with coconut sugar.
  5. Place in the freezer to set up for 1 hour, then store in a container. Defrost for 15 minutes before serving.

Let me know how you liked the recipes in the comments.  Also let me know if you liked my hamantaschen or Daniel’s better. His can be found here: Barbecue Chicken Hamantaschen

Roasted Butternut Squash, Date Salad with Honey Lime Dressing

img_5350Well, it’s that time of year again – beautiful orange leaves on the trees, crisp and cool weather, and an abundance of squash and autumnal flavors!  This flavor challenge was…Dates!  Yes, the sweet, dessert-like, super versatile little flavor bombs.  I’m up for it.

My challenge was to make something for Rosh Hashanah, using dates in my dish.  Now, I could have made something sweet, totally predictable.  Maybe a squash pie with a date and coconut crust.  Or, perhaps the classic stuffed or wrapped date.  But I opted for something else – an appetizer that was delicious, obviously, but not pretentious or even expected.

For this recipe, you can definitely get a whole butternut squash and cube it yourself, (or get it prepared from the grocery store).  Don’t like butternut?  Try something else, like acron, kombucha, or even sweet potato, pumpkin, or anything you like.  Feel free to change it up how you like it!

I love the combination of flavors here – you have sweet, tangy, and even a little bit sharp from the onions.  Here’s a good trick to remove that super spicy bite from the onions.  As you prep the rest of the ingredients, soak the sliced onions in cold water for a few minutes – it’ll rinse off the sharpness, but you’ll still get the onion flavor.

Happy autumn and happy cooking all!


5 from 1 vote
Roasted Butternut Squash, Date Salad with Honey Lime Dressing
Prep Time
15 mins
Cook Time
30 mins
Total Time
45 mins
 
Servings: 4 people
Author: Rachel Katzman
Ingredients
  • 1 Medium Butternut Squash
  • 1 Tbsp. Coconut oil
  • 1 cup Pomegranate Seeds You can use 1 whole pomegranate - to get the seeds, slice in half peel out the seeds in a bowl of cold water
  • 1 Medium Red onion, thinly sliced
  • 1 cup Deglet Noor Dates, chopped You can use Medjool if you prefer, but I like the sweeter, stickier Deglet Noor
  • 1/2 cup Fresh Lime Juice About 3-4 limes
  • 1 Tbsp. Lime Zest
  • 2 Tbsp. Raw Honey Any flavor is fine - use what you like
  • 1/2 tsp. salt
  • 1/2 tsp. White pepper
  • 1/4 cup Fresh chopped parsley
  • 1 Tbsp. Extra Virgin olive oil
Instructions
  1. Pre-heat the oven to 400F and cover a sheet pan with parchment paper
  2. Add the butternut squash to a bowl, mix in the coconut oil, salt and pepper (I like to add a little cinnamon, nutmeg and cloves to my squash, but feel free to just simply add the S&P).
  3. Roast the squash for 30 minutes until just cooked through, but not mushy. Let the squash cool for 15-20 minutes
  4. Add the onions, dates, pomegranate and parsley to a big bowl.
  5. Make the dressing: Add the lime zest and juice to a bowl and whisk in the honey. Continue whisking while adding the olive oil in a slow stream. Adjust seasonings if needed. Side note - I love anything tart, so I really don't add a lot of olive oil to my dressing, but definitely check the taste and add more lime juice, honey or olive oil as necessary.
  6. Add the squash to the salad and toss carefully with the dressing so you don't mush the squash too much. Serve immediately. Note - this salad won't last too long in the fridge. It's good for possibly a day, maybe two, but the squash will absorb the dressing and just get mushier.
Recipe Notes

Zucchini Pappardelle with Mushroom Coconut Cream Sauce

img_5389For this recipe, I broke out the spiralizer.  Yes, I joined the bandwagon last year and bought a hefty one to use for this recipe (I have the Brieftons Tri-Blade Spiralizer in bright green).

So, even though summer is sadly gone, why not make use of those last summer veggies that have been sitting in your crisper!  This recipe is SO easy, takes very little cook time and really takes only a few minutes to put together – I promise!

5 from 1 vote
Zucchini Pappardelle with Mushroom Coconut Cream Sauce
Prep Time
15 mins
Cook Time
15 mins
Total Time
30 mins
 
Course: Main Dish
Servings: 2 people
Author: Rachel Katzman
Ingredients
  • 2 Medium Zucchinis Skin removed and peeled into long ribbon-liked strips using a vegetable peeler
  • 1/4 Cup red onion, thinly sliced Tip: If you rinse the onion under cold water, it removes the sharpness
  • 1 Cup Mushrooms Use whatever you like - cremini, button, porcini, oyster, etc - anything works in this dish!
  • 1/2 Cup Tomatoes, roughly chopped Again, use whatever you like - ideally you should use whatever is in season, around peak of summer time. I used a mixture of heirloom tomatoes in all different colors!
  • 1/2 Tsp. Salt, to taste Adjust seasonings as needed
  • 1/2 Tsp. Pepper, to taste Adjust seasonings as needed
  • 3/4 Cup Coconut Cream Here's a great trick - take a can of full fat coconut milk, turn it upside down and place in the fridge for a few hours. Once it's cold, carefully open the top and scoop out the cream, saving the coconut water for another use
  • 2 Cloves Garlic, peeled and minced
  • 1 Handful Fresh basil, roughly torn
  • 4 Tbsp. Nutritional Yeast
  • 1 Tbsp. Extra Virgin olive oil
Instructions
  1. In a large saucepan over medium-high heat, saute the onions, garlic and mushrooms in 1 tbsp of olive oil for 5 minutes.
  2. Season with salt and pepper (be careful not to over-salt your zucchini, otherwise it'll get mushy really quick).
  3. Add the coconut cream, nutritional yeast and tomatoes.
  4. Add the peeled zucchini ribbons to the pan and cook for another 3 minutes until the zucchini is slightly cooked but still "al-dente" (it should have a bite to it, not mushy).
  5. Sprinkle fresh basil and serve!