Korean BBQ Rice Bowls

Korean BBQ has been on my list to make for a while.  I was looking for something to grill for Father’s day that I could do hot and fast, as I did not have the patience for a long cook. I figured it would be a great time to give it a shot. Korean BBQ is traditionally cooked at the table by the diners on a small table top grill designed specifically for that purpose. You can use standard charcoal grill or even a gas grill in a pinch.  I used a Weber 22″ kettle (I have 5) with some Jealous Devil Max Xl Charcoal Briquets, and it worked great.

Meat For Korean BBQ

Korean BBQ includes several marinated meats including bulgogi (thinly sliced steak), kalbi or galbi (short ribs), and samgyeopsal (pork belly). For the samgyeopsal obviously I didn’t use pork, but I did have some beef bacon in the fridge I need to use up so it seemed like a good opportunity.  Ideally you would use fresh beef navel, but that can be hard to find, so I went with what I had. For the kalbi or galbi I used a thinly sliced mock tender from the chuck.  It is a poor man’s tenderloin, and if you slice it thin enough it works well for this application.

Garnishes

Traditional accompaniments eaten with Korean BBQ include several salads especially kimchi, a spicy fermented cabbage.  I wasn’t able to find kosher kimchi, and I wanted to make a quick version of my own.  For an approximation of kimchi I was able to find gochujang, a Korean fermented hot sauce, which I mixed with sauerkraut. If you can’t find gochujang, you can use sriracha as a substitute.

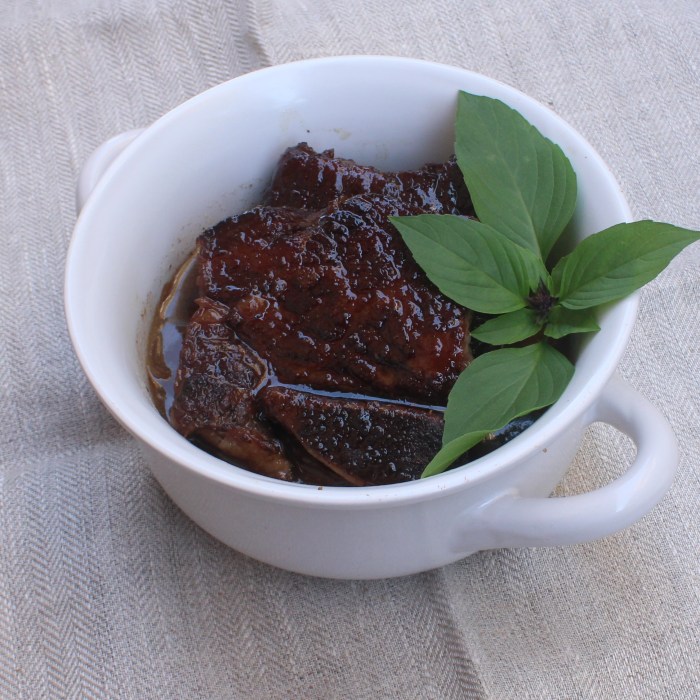
A sprinkle of scallions and toasted sesame seeds would also be appropriate here for some color, crunch, and to cut the richness and sweetness of the meat. While not traditional, I added some edamame (soy beans) still in the shell for a little freshness and a pop of color. I often eat  edamame straight from their pods as a snack, dipped in some spicy duck sauce. When you plate up, use a wide bowl.  Mine was too small, because that is what I had.

Don’t forget to check out some of our other Asian or BBQ recipes (great for the 4th of July)

0 from 0 votes
Kosher Korean BBQ Rice Bowl
Prep Time
2 hrs
Cook Time
30 mins
 

A kosher version of a classic Korean meal, great for a twist on a summer BBQ.

Course: Main Course
Cuisine: Asian, BBQ, Korean, Kosher
Keyword: BBQ, Korean, Korean BBQ, kosher
Servings: 2 People
Author: Daniel Peikes
Ingredients
Bulgogi (Thinly Sliced Steak) or Kalbi (Short Ribs)
  • 1 Pear (Use an Asian pear if you can find it, otherwise any pear will do) Peeled, cored, chopped, and blended smooth
  • 2 tbsp Brown Sugar
  • 1 tsp White Pepper
  • 1 tbsp Ground Ginger
  • 3 Cloves Garlic Minced
  • 1/2 Cup Soy Sauce
  • 2 tbsp Honey
  • 2 tbsp Mirin or Sherry
  • 2 tbsp Toasted Sesame Oil
  • 1/2 lb Thinly Sliced Steak (Bulgogi)or Thinly Sliced Short Rib (Kalbi) Cut Across the Bones
Kosher Samgyeopsal (Beef Navel)
  • 1/2 lb Thick Cut Beef Bacon Raw beef navel would be more traditional but can be harder to come by
  • 2 Scallions Sliced Thin
  • Juice of 1 Lime
  • 1 tsp Gochujang (Sriracha will do in a pinch)
  • 1 tbsp Honey
  • 1 tbsp Soy Sauce
  • 1 tbsp Toasted Sesame Oil
  • 1 tbsp Rice Vinegar
Accompaniments and Garnishes
  • Black and White Toasted Sesame Seeds
  • Chopped Scallions
  • Frozen Edamame Still in the pod, steamed in the microwave
  • 2 Cups Cooked White Rice
Quick Kosher Kimchi
  • 1/2 Cup Sauerkraut
  • 1 Tbsp Gochujang (Sriracha will do in a pinch)
Instructions
Bulgogi (Thinly Sliced Steak) or Kalbi (Short Ribs)
  1. You can use the same marinade for bulgogi or kalbi. If you are making both you may want to double the recipe.

  2. In a large bowl combine the pear, brown sugar, white pepper, ginger, garlic, soy sauce, mirin or sherry, honey, and toasted sesame oil. Add the steak or short ribs and allow to marinate for 1-4 hours

  3. Cook on a grill or on grill pan over high heat until nicely seared on each side,

Kosher Samgyeopsal (Beef Navel)
  1. In a large bowl combine the gochujang, scallion, lime juice, soy sauce, honey, rice vinegar, and toasted sesame oil. Add the beef bacon and allow to marinate for 1-4 hours

  2. Cook on a grill or on grill pan over high heat until nicely seared on each side,

Quick Kosher Kimchi
  1. In a small bowl combine the sauerkraut and gochujang. Mix thoroughly.

Assembly
  1. Place you rice in a mound in a bowl. Top with your meat and garnish with kimchi, edamame, scallions, and black and white toasted sesame seeds.

Crispy Beef for a Kosher Christmas


Crispy BeefI eat Chinese food on Christmas and if I have time go to the movie theater too (or at least watch Die Hard). The custom for Jews to eat Chinese food on Christmas dates back to the late 1800s. I love making my own Chinese food. While it can be a bit labor intensive, it is easier than you think. Don’t worry if your dumplings don’t look perfect, your family will love them any way. This year I decide, by popular demand, to tackle a simple classic, crispy beef.

Better Crispy Beef

Crispy beef is a Chinese American appetizer that easily converts to a main dish when added to the stir fried vegetables of your choice and served along side white rice, so feel free to dress up the basic version of this recipe and make it your own. We are going to start out by tenderizing the beef by coating it in baking soda. This is similar to what we did in the past for other Chinese dishes such as beef and broccoli.  This changes the pH (remember high school chemistry) which spreads out the fibers of the beef, giving it a softer mouth feel. It is served with a simple sweet soy and sesame sauce, that can be augmented with red pepper flakes if you like  things on the spicy side.

Wok This Way

A wok is one of the most versatile cooking implements you can have. They are fairly inexpensive, especially if you have an Asian restaurant supply store near you.  I just would stay away from the non-stick ones and go with carbon steel.  Because of their high sides woks can be used for sautéing and shallow or deep frying. There is nothing like a fry fest Asian style.  Whether it be deep fried eggrolls or won-tons, lo mein or fried rice, or wok tossed sweet and sour chicken or spicy kung pow beef, I love it all.

What is your favorite Chinese dish? Let us know in the comments. Don’t forget to try some of our other Asian dishes:

Orange Chicken: A Jewish Tradition

Beef and Broccoli(ni) in Brown Sauce

Asian Recipe Collection

5 from 1 vote
Crispy Beef
Crispy Beef
Prep Time
40 mins
Cook Time
10 mins
Marinating time
1 hr
 

A Chinese food classic perfect for a kosher Christmas.

Course: Appetizer, Main Course
Cuisine: Asian, Chinese, Holiday, Jewish, Kosher
Keyword: Chinese, christmas, crispy beef, kosher
Servings: 4 Servings
Author: Daniel Peikes
Ingredients
  • 1 lb Pepper steak Sliced in to 1 inch squares, ¼" thick
  • 3 tbsp Baking Soda
Marinade
  • 1/4 cup Soy Sauce
  • 1 tsp White Pepper
  • 1 tbsp Ginger Fresh is best, but dry will work in a pinch.
  • 1 tbsp Sesame Oil
  • 4 cloves Garlic Chopped fine
Sauce
  • 1/2 cup Soy Sauce
  • 1 tbsp Ginger Fresh is best, but dry will work in a pinch.
  • 1/2 cup Honey
  • 1 tbsp Rice Vinegar
  • 2 tbsp Sesame Oil
Coating and Garnish
  • 1/4 Cup Corn Starch
  • Vegetable Oil For frying
  • 1 Bunch Scallions Sliced thin
  • 1/4 Cup Sesame Seeds For garnish
Instructions
  1. In a mixing bowl combine with the baking soda and beef and place in the fridge for a half an hour.

  2. While the beef is in the fridge combine the marinade ingredients in a bowl: soy sauce, ginger, white pepper, and sesame oil. Remove the beef from the fridge rinse off the baking soda and add the beef to the marinade. Place back in the fridge for an hour.

  3. While the beef is marinating combine the sauce in the ingredients in a sauce pot: soy sauce, honey, ginger, rice vinegar, and sesame oil. Place the pot over medium heat and reduce by 25%.

  4. Remove the beef from the marinade and dust with corn starch.

  5. Add enough oil to a wok or large frying pan come about 1 inch up the side and place over medium heat. Once the oil is hot fry the beef in batches until golden brown and remove to a paper towel lined plate.

  6. Once the all the beef is fried, allow the oil to cool and pour it out of the wok or pan. Add the sauce to wok or pan and place over low heat. Add the beef to the sauce and stir to coat.

  7. Serve immediately topped with the sliced scallions and sesame seeds with white rice.


Cabbage Pancakes (for Passover!)

Cabbage Pancakes

Lately, I’ve been a little preoccupied, with the move just a few weeks ago and setting up our new condo. Things are definitely in good shape here, but since Passover is HERE, I had to bring you all at least 1 new recipe – and this one came out of sheer necessity to clean our our fridge. I had a bag of coleslaw mix that I didn’t know what to do with. Sure, I could make the standard mayo or vinegar-based coleslaw, but I was bored of that. I needed something new and exciting. And then, BOOM. My Pizza Latke recipe uses sauerkraut as the base (because cabbage gets crunchy when you fry it)! So off I went, transforming the humble bag of coleslaw mix into crunchy, savory cabbage pancakes. The perfect pre-seder (or anytime) snack for Passover!

These savory pancakes are my spin on Japanese street food called okonomiyaki – made with flour, eggs, cabbage and a protein. This recipe is great for using up leftovers in your fridge. Although I didn’t use protein in my version, go ahead and add some canned tuna or salmon, ground beef or maybe cubed salami! It’s a perfect base for a savory pancake.

If you’re not planning on making this for Passover, feel free to garnish with sesame seeds (unless you eat Kitniyot) or add in coconut aminos or soy sauce. And play around with the spice level too! Maybe you have some gochujang in your fridge (okay, well that’s Korean, but hey, I did say this was my spin), or pickled jalapenos. You can even add in shredded cheese (similar to my pizza latkes) with an Asian twist.

There ya have it.

Even though I’m still trying to figure out where I put most of my kitchen stuff, I managed to give ya’ll a new recipe.

Happy Passover – Chag Kasher V’Sameach!

0 from 0 votes
Cabbage Pancakes
Prep Time
20 mins
Cook Time
20 mins
 
Course: Appetizer
Cuisine: Asian
Author: Rachel Katzman
Ingredients
  • 1 Eggs
  • 1/4 cup Water
  • 1 bag Coleslaw mix I mean, you CAN shred your own cabbage and carrot, but why not go for a shortcut and make your life easier?
  • 1 tbsp. Avocado oil
  • 1 1/2 tbsp. Kosher-for-Passover soy sauce or Teriyaki sauce
  • 1 cup Almond Flour
  • 2 tbsp. Olive or Avocado oil, for frying
  • 1 tbsp. Gochujang (Korean hot pepper paste) Optional
Toppings
  • 1/4 cup Mayo
  • 2 tbsp. Sriracha
  • 2 Green onions, sliced I didn't have any when I made this, so I topped mine with a drizzle of sriracha (I skipped the mayo), dried parsley and chives!
Instructions
  1. Mix all ingredients (except the extra 2 tbsp. of oil) in a large bowl and mix well until all ingredients are combined

  2. Heat the oven in a large skillet or cast iron pan

  3. Once the oil is hot, add a spoonful of the pancake batter, making a 4-6" circle and about 1/2 in thick

  4. If you have a lid handy, this is the time to use it - it will help cook the cabbage instead of just crisping up the outside of the pancake. Cook for about 3-4 minutes until golden brown then flip and cook on the other side

  5. Add the cooked pancakes to a plate and cover (to keep warm) with foil until ready to eat.

  6. Garnish the pancakes with mayo, sriracha mayo, sliced green onions, sesame seeds (kitniyot), or any other dried or fresh herbs you might have lying around!

A Trio of Simple Super Bowl Chicken Wings

Chicken WingsWell, we are about a week away from the Super Bowl. Is there any food more associated with watching football than chicken wings? But how do you get them crispy without making a mess or spending a lot of time?  Generally wings get their crispiness from frying either unadorned for crispy skin or with some sort of breading for a little extra crunch. But what do you do if you don’t want to bread or fry your wings? The trick is a two stage cook.  First cook the chicken wings at a lower temperature to make sure the wings are cooked through without drying them out.  Then you crank the heat to crisp up the skin.

Now that we have the crispy skin all sorted out, let’s talk sauce. Wings are a great platform for whatever flavors tickle your tongue. I developed a trio of sauces to try and capture a broad range of palettes.

Some Like It Hot

The hot wing is probably the most popular of the chicken wing flavors.  The most common version is the buffalo wing, which uses store bought hot sauce, usually Franks’s RedHot, combined with margarine, but I wanted to go with something different. Many people are familiar with sriracha, the delicious Asian style hot sauce made by Huy Fong in Irwindale, CA. But what many people don’t know is that they make a couple of other products.  They make a chili garlic sauce that is great. It has a bit more heat, texture, and complexity than your average hot sauce.  I created a sauce based on it for those who like their wings with a kick.

Some Like It Sweet

I realize that not everyone likes things spicy. If you have more of a sweet tooth than a hot head you might want to try my second sauce. Sticking with the pseudo Asian theme, I decided on a teriyaki style sauce. I added some pineapple juice to give it a bit of a Hawaiian flair.

Some Like It Tangy

Continuing with the Asian theme, I went with lime which hails from a bit further west around India and the adjoining parts of Myanmar. I paired it with pomegranate to add some fruitiness.  The pomegranate also gives the wings a great color.  I added some honey to this to balance out the sharpness of the other ingredients.

What is your favorite flavor of chicken wing? Let us know in the comment.

0 from 0 votes
Chicken Wings
Easy Oven Wings
Prep Time
5 mins
Cook Time
1 hr 25 mins
 

An easy way to get crispy wings, without frying!

Course: Appetizer, Snack
Cuisine: American, Bar
Keyword: chicken wings
Servings: 3 Servings
Author: Daniel Peikes
Ingredients
  • 12 Whole Chicken Wings
  • 1 Cup Wing Glaze See below for 3 different wing glazes
Instructions
  1. Preheat your oven to 250°F.

  2. Place the wings on the a parchment paper lined sheet pan.

  3. Roast the wings for about about an hour.

  4. Increase the temperature to 450°F until the skin of the wings are brown and crispy amount another 20 minute but keep an eye on it.

  5. Remove the wings and lower the oven heat to 350°F.

  6. Brush your favorite glaze on the wings, and return them to the oven until the sauce sets, about another 5 minutes.


0 from 0 votes
Chicken Wings
Chili Garlic Sauce
Author: Daniel Peikes
Ingredients
  • 12 Cloves Garlic
  • 3/4 Cup Dried Red Chilis
  • 1/4 Cup Soy Sauce
  • 1/4 Cup Rice Vinegar
  • 2 tsp Sesame Oil
  • 1/2 Cup Honey
Instructions
  1. Add the garlic, chilies, soy sauce, and rice vinegar to your food processor fitted with an "S" blade and blend until it it forms a thin paste.

  2. Pour the chili mixture into a small sauce pot and add the honey. Place over low heat and bring to a simmer.

  3. Remove from the heat and allow to cool. Apply to wings or put in an airtight container and store in the refrigerator.

0 from 0 votes
Chicken Wings
Pineapple Teriyaki Wing Sauce
Author: Daniel Peikes
Ingredients
  • 1 1/2 Cups Pineapple Juice
  • 1/4 Cup Soy Sauce
  • 1/4 Cup Molasses
  • 2 tbsp Garlic Powder
  • 2 tbsp Ground Ginger
  • 1 tsp White Pepper
Instructions
  1. Add all the ingredient to a sauce pan and place over medium heat. Stir to combine. Cook until reduced to a syrupy consistency.

  2. Remove from the heat and allow to cool. Apply to wings or move to an airtight container and store in the refrigerator.

0 from 0 votes
Chicken Wings
Pomegranate Lime Wing Sauce
Author: Daniel Peikes
Ingredients
  • 1 1/2 Cups Pomegranate Juice
  • 1/4 Cup Lime Juice
  • 1 tbsp Soy Sauce
  • 1/2 Cup Honey
  • 1 tsp White Pepper
Instructions
  1. Add all the ingredient to a sauce pan and place over medium heat. Stir to combine. Cook until reduced to a syrupy consistency.

  2. Remove from the heat and allow to cool. Apply to wings or move to an airtight container and store in the refrigerator.

Check out some of our other Super Bowl recipes:

Super Bowl Snack Challenge: Steak and Eggs Tot-Chos (Tater Tot Nachos)

Super Bowl Snacks: Cheddar Stuffed Jalapeno Hush Puppies

Super Bowl Snack – behold the “Nacho Jalapeno Cheese Crisp”!

Orange Chicken: A Jewish Tradition

Orange Chicken

As the end of the year approaches, like any good Jew, my mind turns to one thing: Chinese food. Unlike the rest of my family, I like a little kick in my Chinese food, and the classic Americanized Chinese dish of orange chicken was just the thing to satisfy my craving.  The recipe calls for a teaspoon of red pepper flake but if you don’t like things spicy you can simply leave it out.  The orange sauce is great on beef as well.

I call for boneless skinless chicken breast in this recipe, although many restaurants make their orange chicken with dark meat.  The reason for this is I find many people keep boneless white meat stocked in their freezer.  Also, boneless white meat tends to be a little cheaper than boneless dark meat.  If you have have the time and want to save a few bucks you can buy chicken thighs and remove the skin and bones yourself.  You will get better flavor, save a few bucks, and you can use the bones to make chicken soup.  If you are feeling adventurous you can save the skins and use the them to make schmaltz and gribenes.

Orange Chicken Alternatives

If you are looking for something a little heathier (or are feeling lazy) and don’t want to cut up, batter, and fry boneless chicken, you can always just make the sauce and pour it over a bone in thighs or an 8-piece cut up chicken and bake it in the oven.  It also makes a great dipping sauce for chicken wings.

Do you eat Chinese food this time of year? What is your favorite Chinese dish or appetizer?  Let me know in the comments!

0 from 0 votes
Orange Chicken
Orange Chicken
Prep Time
30 mins
Cook Time
30 mins
 

A sweet Chinese classic, with touch of heat.

Course: Dinner, Main Course
Cuisine: Chinese
Keyword: Chicken, Chinese, kosher
Servings: 4 Servings
Author: Daniel Peikes
Ingredients
Orange Sauce
  • 4 Cups Orange Juice
  • 1 tbsp Garlic Powder
  • 1 tbsp Ground Ginger
  • 1 tbsp Toasted Sesame Oil
  • 1 tbsp Soy Sauce
  • 1/2 Cup Honey
  • 1 tbsp Rice Vinegar
  • 1 tbsp Orange Zest
  • 1 tsp Red Pepper Flakes Optional
Chicken
  • 2 lbs Boneless Chicken Breast Cut in to 1/4" thick pieces, about 1" square
  • 1-1/2 Cups All Purpose Flour
  • 1/2 Cup Corn Starch
  • 1 tsp Baking Powder
  • 1 tsp White Pepper
  • 1 Large Egg
  • 2 Cups Cold Seltzer
  • 1 tsp Soy Sauce
  • 2 tbsp Vegetable Oil
  • 1 tbsp Orange Zest
  • Oil For Frying
  • Sliced Scallions or Parsley Optional for garnish
  • Sesame Seeds Optional for garnish
Instructions
Orange Sauce
  1. Add the orange juice, garlic, hinger, honey, toasted sesame oil, and soy sauce to a medium sized sauce pot and place over high heat. Cook until reduced by half.

  2. Add the vinegar, orange zest and red pepper flake (optional). Stir to combine.

Chicken Batter
  1. In a large mixing bowl combine the flour, corn starch, baking powder, and white pepper.

  2. Add the egg, seltzer, soy sauce, vegetable oil, and orange zest. Stir to combine. It should be the consistency of a thin pancake batter. If it is too thick add a little more seltzer.

  3. Toss the chicken in the batter. and let it sit in the fridge of fifteen minutes.

  4. Add enough oil to come about 1/2 way up to a Dutch oven or a heavy pot and place over medium low heat until it comes to 350°F. Allow the excess batter to drip off of the chicken before adding it to the oil. Working in small batches, add the chicken to the oil and fry until golden brown. Make sure the oil doesn't get too hot or the outside of the chicken will burn before it cooks in the center.

  5. Add the sauce to skillet and bring to a simmer. Add the chicken to the sauce and toss to coat. Garnish with scallions or parsley and sesame seeds. Serve immediately.

Check out some of our other Asian influenced dishes:

Thai Chicken Won-tons With Peanut Dipping Sauce

Beef and Broccoli(ni) in Brown Sauce

Thai One On: Drunken Noodles


Peking Duck For Thanksgiving

Peking Duck

Like many people, it looks like we are going to be a small crowd for Thanksgiving this year, but I still wanted to do something special. I came across a duck on sale at my local grocery store and I figured it would be the perfect thing. Nicer than the average chicken and small enough to feed the family without too much left over.  Peking duck has been on my list to make for a while so I figured this was the perfect excuse. Similarly to turkey, Peking duck is often carved tableside. Peking duck is named after the city it comes from, the capital of China. Peking is more commonly known as Beijing. It got the name Peking due to the translation  by postal authorities in the late 19th and early 20th centuries.

Peking Process

Peking duck was originally considered food for royalty, and was regularly on the menu in the Chinese Imperial court. Traditionally it was was cooked over peach or pear wood. To honor this tradition I have included instructions for cooking this the duck in the smoker as well as a traditional oven. One of the key parts making Peking duck is separating the skin from the fat. This helps the fat render and the skin crisp. You can do this by sliding your fingers between the skin and the fat, but the best (and most fun) way to do this is inflate the duck with an air compressor.  Luckily, a friend recently gave me a spare compressor. (Thanks Amitai). Also, the duck really benefits from being cooked vertically. This prevents the bottom of the duck from stewing in its own juices. If you can hang your duck when cooking or use a vertical roasting rack.  In a pinch, you use an empty beer can inserted into the bottom of the cavity to prop your duck up.

Adding Thanksgiving Flavor

Most recipes for this dish call for red vinegar, but I know that can be hard to find, and even harder to find kosher. Instead of using red vinegar I used apple cider vinegar mixed with jelled cranberry sauce right out of the can.  This provided the red color, along with the added benefit of infusing some traditional Thanksgiving flavor. Also, the primary seasoning for Peking duck is Chinese five spice, which includes many traditional fall and winter holiday flavors like anise, cinnamon, and clove. 

0 from 0 votes
Peking Duck
Thanksgiving Peking Duck
Prep Time
30 mins
Cook Time
1 hr
 

An American twist on a Chinese classic. A great dish when you are looking for something special for the holidays and you have a small crowd.

Course: Main Course, Poultry
Cuisine: American, Asian, Chinese, Holiday
Keyword: Chinese, Duck, Peking, Peking Duck
Servings: 4 People
Author: Daniel Peikes
Ingredients
  • 1 Duck
  • 1/4 Cup Hoisin Sauce
  • 1/2 Cup Chinese Five Spice Mix-Divided See recipe below. Store bought will work in a pinch.
  • 2 Tbsp Kosher Salt
  • 1/2 Cup Jelled Cranberry Sauce Straight from the can.
  • 1/2 Cup Honey
  • 1 Cup Apple Cider Vinegar
  • 2 Tbsp Soy Sauce
  • 1 Scallion Sliced Thinly
  • 1 Cubic Inch Ginger Peeled and sliced into planks
  • Water Enough to fill a large pot or wok
Instructions
  1. Remove any feathers that that remain on the duck, being carefully not to tear the skin. Trim any excess fat from both ends of the cavity. Tip: Don't throw out that fat. Render it and use it to cook potatoes (or latkes!). Duck fat is one of the tastiest fats out there.

  2. In a small bowl, combine all of the hoisin sauce, kosher salt, and half of the Chinese Five Spice mix. Spoon all of the mixture into the bottom of the cavity of the duck. Using your fingers, spread the hoisin and five spice mixture. Then add the ginger and scallions to the cavity and close the cavity up using the skewer to pin the two sides of cavity shut.

  3. Next separate the skin from the fat. You can you this by inserting your fingers between the skin and meat. Alternatively you can do this by inflating the duck with an air pump or an air compressor, inserting the air hose under the skin of the duck's neck.

  4. Fill a large pot or wok with water and two tablespoons of Chinese five spice. Place over high heat and bring to a boil. Once the water is boiling, ladle it over all parts of the duck being careful not to get any in the cavity. This should cause the skin to tighten up.

  5. In a small sauce pot, combine the apple cider vinegar, honey, cranberry sauce, soy sauce, and the remainder of the Chinese five spice. Place over medium heat and stir until the cranberry sauce is dissolved. Allow the mixture to cool slightly and brush the skin of the duck with the mixture.

  6. Place the duck on a wire rack over a lined sheet pan. Place in the refrigerator, uncovered to allow the skin to dry for a minimum of 8 hours.

  7. Roast the duck vertically at 275°F for about 45 minutes. If you are using a vertical roasting rack you will need to open up the bottom of the cavity that you sewed shut with the skewer. Then raise the heat to 400°F and cook until the skin crisps up, about another 10 minutes.

    If roasting vertically is not an option put the duck back on the wire rack over the sheet pan that you used when you put the duck in the refrigerator to dry the skin. Just make sure to drain the fat out of cavity about every 15 minutes when cooking by picking it up vertically for a minute.

  8. Alternatively you can smoke the duck using the same times and temperatures stated above by hanging it by its wings with stainless steel hooks from the grates in your smoker over fruit wood. (Peach or pear wood be best but apple will work just fine and is much easier to find). Be careful not to let the the duck to get too close to fire or it will burn.

  9. Allow the the duck to rest for about 10 minutes or until it is cool enough to handle. Remove the leg quarter from the breast by cutting the joint between them. Remove the wings by cutting around the joint that attaches it to the breast. Then remove the breast meat by cutting down along the breast bone. Slice the breast meat in to 1/2" pieces and serve. Pro tip: The skin off the the back bone is delicious. Keep it a cooks treat, you've earned it. Serve alongside some plum sauce or hoisin sauce.

0 from 0 votes
Moscow Mule
Chinese Five Spice Powder
Prep Time
2 mins
Cook Time
3 mins
 
Course: Seasoning
Cuisine: Asian, Chinese
Keyword: Chinese, Chinese Five Spice, Chinese Five Spice Powder, Chinese Spice, Five Spice, Spice
Servings: 1 Cup
Author: Daniel Peikes
Ingredients
  • 4 tbsp Whole Cloves
  • 4 tbsp Fennel Seed
  • 4 Whole Star Anise
  • 1 Soft Cinnamon Stick
  • 4 tbsp Sichuan Peppercorns
Instructions
  1. Put all the spices in a dry skillet over low heat. Toast the spices until fragrant, making sure to keep them moving in the skillet so they don't burn.

  2. Break up the cinnamon stick and add the spices your electric grinder or mortar and grind to a powder. Store in an airtight container.


Don’t forget to check out Rachel’s latest Thanksgiving recipe:

Chocolate Pumpkin Brownies


Leek Pancakes with Spicy Honey Dipping Sauce

Who can believe that Rosh Hashanah is just 1 week away??!! This year could not have gone any faster, which I guess is a good thing, right? Oy vey.

My husband and I have a yearly tradition to go to the Peikes’ for first night of yom tov. And if you caught his Braised Short Ribs post, you’ll notice that this year is an Asian-themed menu! Sort of a “Chinese New Year”-style. For Rosh Hashanah, the Jewish New Year. Ah, see what we did there? 🙂  Okay, well technically, the Chinese New Year is in Feb 2021, the year of the Ox, but who knows, maybe Daniel will use that as inspo and make a braised oxtail recipe? #challenge

And so, it’s my turn now to present you with my easy-peasy Leek Pancakes with Spicy Honey Dipping Sauce!

Symbolic Foods

Scallion Pancakes are the more traditional version of this dish, but in honor of the Jewish New Year, leeks carry major symbolism. Why are they symbolic on our Rosh Hashanah seder table you ask? Well, the ancient Aramaic word for leeks is “karsi” sounds like the word “yikarsu” which means to “destroy” or “cut”. It’s pretty simple – in the prayer we say right after eating leeks, we ask G-D for protection against our enemies, that they should be “cut off” in the upcoming year. Pretty deep stuff for a humble allium.

But by all means, you can make this dish on Rosh Hashanah, or all year round, either with leeks or scallions. I mean, they’re basically cousins, so why not?

Scallion Pancakes, also known as “Cong You Bing“, is a staple in Chinese cuisine, more so in the appetizer category. Specifically, a savory, unleavened flatbread or pancake with sliced scallions/green onions (or in our case, sliced leeks) and sesame oil folded in. Traditionally, it’s made using a dough instead of a batter and pan-fried to give the pancake crispy edges and a soft chewy bite.

A twist on a classic

Well, I’m going outside of tradition just a tad with my own spin on this Leek Pancake to make it as easy-as-possible. How did I do that? Well, we’re making pancakes after all, so I went with a batter instead of a dough. And hey, it’s okay to experiment with these recipes! I’m a big believer in playing with your food and coming up with interesting alternatives. So I say go for it!

I also went gluten-free and low carb with this too, but feel free to use all-purpose flour instead, you might just end up with a crispier pancake than mine, but it’s still tasty. I was really going for a super-simple recipe for these pancakes – no intimidating dough to make here.

And finally, don’t forget the spicy dipping sauce – with HONEY, perfect for Rosh Hashanah, for instilling a sweet new year. The sauce brings the sweet, tangy and spicy component to compliment the pancake.

From us here at Meat Your Vegetables, wishing you a Kesiva V’chasima Tova – here’s to a sweet, happy, healthy and SAFE New Year, 5781!!


0 from 0 votes
Leek Pancakes with Spicy Honey Dipping Sauce
Prep Time
15 mins
Cook Time
40 mins
 
Course: Appetizer
Cuisine: Chinese
Servings: 6 medium-sized pancakes
Author: Rachel Katzman
Ingredients
Scallion Pancakes
  • 1 Egg
  • 1 tsp. Salt
  • 1 tsp. Sugar, or sugar substitute
  • 1 Leek, thoroughly cleaned and sliced into half-moon shape, or you use scallions/green onions Leeks are very sandy and dirty, so my trick is to cut off the dark green leafy end and cut off the root, then slice down the middle and into half-moon shapes. Fill a large bowl with water and soak the leeks for a few minutes. Using your hands to try and remove the grit. Then scoop the cleaned leeks into a colander to drain.
  • 1 1/2 cups water
  • 1 1/2 cups Almond Flour
  • 1 tbsp. Sesame oil
Spicy Honey Dipping Sauce
  • 3 tbsp. Unseasoned rice wine vinegar
  • 2 tbsp. Coconut Aminos Or use soy sauce or Tamari
  • 1 tsp. Sambal Oelek Asian chili sauce
  • 1/4 tsp. Crushed red pepper flakes Optional, in case you want more of a punch of heat
  • 1 tbsp. Honey You can use raw honey if you like, just make sure you dissolve it thoroughly into the sauce
Instructions
  1. To make the pancakes, in a bowl, whisk the egg, salt, sugar, leeks (or scallions) and almond flour

  2. Slowly add in water in 3 batches and keep whisking the batter, the add sesame oil

  3. Let the batter rest for 5-10 min until thick

  4. While the batter is resting, make the spicy honey dipping sauce

  5. Whisk vinegar, coconut aminos, sambal, honey and red pepper flakes in a small bowl. Taste and adjust flavors if needed

  6. Heat a non-stick saute pan over medium heat and drizzle a teaspoon of oil (I like to use avocado oil because it has a high heat point and is neutral-tasting, but you can use sesame oil too)

  7. Add 1/4 cup of the batter to the pan so you get a evenly round pancake shape

  8. Cook until you see bubbles forming on the edge, about 3 minutes per side

  9. Flip carefully with a spatula and cook on the other side for another 2-3 minutes until golden brown, but not burnt

  10. Repeat with the rest of the batter

  11. Once the pancakes are cooled, cut half and then into wedges, or cut into whatever shape you like to dip into that spicy dipping sauce!

  12. Serve the pancakes with the sauce and garnish with more sliced leeks or scallions and sesame seeds


Braised Short Ribs with Apples and Pomegranate Honey Glaze

Short RibsI love short ribs. I particularly like sticky Asian style short ribs,  although they can be a bit pricey.  As we are going with an Asian theme this year for our first night of  Rosh Hashanah (AKA Jewish New Year) menu, I am springing for the short ribs.  First night of Rosh Hashana is the one time a year I really go all out and pick up a nicer piece of meat.

This recipe is inspired by fusing this dish with the some classic Rosh Hashana flavors.  I chose apples, honey, and pomegranate as they provide sweetness, a central theme for Rosh Hashana.  The pomegranate lends some sweetness along with some tartness to help balance it out. It also provides a nice red color to the glaze.

This recipe feeds 2 people but can easily scaled up, as long as you have a pot large enough.

ThermoPro TR15H Digital Instant Read Meat  ThermoPro TP15HThermometer Review*

I cooked the ribs to an internal temperature of about 205°F. 205°F is a magic number for tender beef that you don’t want to completely fall apart.  I checked the temperature with the new ThermoPro TR15H Digital Instant Read Meat Thermometer available on Amazon for about $11.65 after coupon.  The coupon is available right on the listing, all you need to do is check the box.  The probe is nice and long and the body of the thermometer has a convenient loop for hanging as a well as a magnet for sticking on your fridge.  The long probe along with the fact that it has a back light and temperature lock functionality make it great for sticking in a dark oven without burning your your face trying to read it. 

 ThermoPro TP15H BacklightI did a quick calibration test with some ice water and it read right at 34°F.  When I ran the ice water calibration test I compared it to my Classic Super-Fast Thermapen which I love, but is significantly more expensive.  The Thermapen settled on temperature a few seconds faster than the ThermoPro TR15H.  For less than a quarter of the price the TR15H is a great budget option. 


I do prefer a  thermometer with a probe that folds in to the handle. ThermoPro does have several other models that have that feature.  We reviewed one a few years ago (along with a great smoked chicken recipe), check it out here: Apple Wood Smoked Chicken Recipe and ThermoPro Thermometer Review.  Another cool feature the TR15H has is a calibration mode.  I haven’t had a chance to test that out yet as it seems pretty accurate out of the box.

Don’t forget to check out some of our other Rosh Hashana recipes:

Delicata Squash Stuffed With Apples Dates and Leeks and Rosh Hashanah Menu

First Night of Rosh Hashanah 5779 Menu Retrospective and Zucchini Leek Soup Recipe

Gluten-Free Honey Muffins & Ginger Maple Apple Chips For Rosh Hashanah

Recipe: Braised Short Ribs with Apples and A Pomegranate Honey Glaze

0 from 0 votes
Short Ribs
Braised Short Ribs with Apples and a Pomegranate Honey Glaze
Prep Time
10 mins
Cook Time
2 hrs
 

Asian style braised short ribs fused with Rosh Hashanah flavors of apple, honey, and pomegranate. A sweet dish for your New Years table.

Course: Main Course, Meat
Cuisine: Asian, BBQ, Holiday, Jewish
Keyword: Braised Short Ribs, Ribs
Servings: 2 Servings
Author: Daniel Peikes
Ingredients
  • 2 lbs Flanken Cut Short Ribs Flanken cut means cut in strips across the bones
  • 2 tbsp Vegetable Oil
  • Salt and Pepper To taste
  • 3 Apples Peeled, cored, and diced
  • 2 Onions Sliced
  • 6 Cloves Garlic Roughly chopped
  • 2 Cups Beef Stock Homemade would be best, but boxed will do in a pinch
  • 1 Cup Pomegranate Juice
  • 1/2 Cup Honey
Instructions
  1. Preheat your oven to 250°F. Lightly coat the ribs with oil and season with salt and pepper.

  2. Place a heavy pot or dutch oven over high heat. Sear the ribs on each side until browned.

  3. Remove the ribs and reduce the heat to low. Add the onions and apples and saute until they begin to brown.

  4. Remove the pot from the heat, return the ribs, and add enough beef stock to make sure the ribs are submerged about half way.

  5. Put the cover on the pot and move it to the oven. Cook until the ribs are tender but not mushy, about 2 hours.

  6. While the ribs are coking add the pomegranate juice and the honey to a small sauce pot and cook over high heat stirring regularly until the mixture is reduced to a syrup.

  7. Once the ribs are tender, remove them from the pot from the oven and raise the oven temperature to 400°F. Place the ribs on a rimmed baking sheet lined with parchment paper. Lightly coat the ribs on both sides with the pomegranate syrup. Place the ribs back in the oven for just a few minutes to set the glaze, being careful not to let it burn.

  8. Put the pot with the beef stock, apples, and onions back on the stove over high heat and reduce until it thickens into a sauce. Cut the ribs between the bones, plate on top of the sauce and serve.

*ThemoPro provided the new thermometer for me to review, but did not sponsor this post.  In the past they have provided free products for me to review as well as sponsoring the thermometers for the 3rd Chicago Kosher BBQ Competition


Spicy Thai Basil Chicken Tacos

Thai Chicken TacosWhy Thai

Rachel and I both started small container gardening this year. Both of us had limited success.  One thing that did grow well for both of us was basil.  We figures why not do a basil ingredient challenge as we both already had it on hand. I grew three types of basil, but my Thai sweet basil grew the largest by far. Although traditionally Spicy Thai Basil chicken is made with Thai holy basil, the Thai sweet basil works just fine, or you could even even use regular basil if that is all you can get your hands on.

Tasty Tacos

Traditionally this dish is served with rice, but I wanted to go in another direction.  Originally I thought about making this in to a noodle dish, but eventually settled on the what I believe to be the most universal of all dishes, the taco. In my opinion tacos are really the words greatest food. There really isn’t anything you can’t throw in a tortilla for a quick meal making is a great vehicle for my spicy Thai basil chicken.

Spicy Chicken

While the recipe calls Thai chilies, you can definitely substitute other chilies like serranos or jalapenos if that is what you have or leave the chilies out all together if you are not a fan of spicy food. Pro tip: if you want to cut the spice level of a chili pepper remove the ribs and seeds. Also, don’t forget to wear disposable gloves so your hands and eyes don’t burn.

Don’t forget to check out Rachel’s Bail recipe: Tornado Potatoes with Spicy Basil Oil

0 from 0 votes
Spicy Thai Chicken Tacos
Spicy Thai Basil Chicken Tacos
Prep Time
15 mins
Cook Time
10 mins
 

Spicy Thai Basil Chicken Tacos - A delicious fusion of a Thai classic and a Mexican favorite. Your taco Tuesday will never be the same.

Course: Appetizer, Dinner, Lunch, Main Course
Cuisine: Fusion, Mexican, Thai
Keyword: Basil, Chicken, Tacos, Thai
Servings: 6 Tacos
Author: Daniel Peikes
Ingredients
  • 2 Boneless and skinless chicken breast
  • 4 Cloves Garlic
  • 4 Dried Thai Chilies Stems removed and roughly chopped
  • 3 tbsp Vegetable Oil For frying
  • 1 Large White Onion Sliced thin
  • 1 Large Green Bell Pepper Sliced thin
  • 1 Large Red Bell Pepper Sliced thin
  • 1 Cup Basic Brown Sauce See recipe below
  • 12 Thai Basil Leaves
  • 6 Fresh Thai Chilies Stems removed
  • 6 Small Corn Tortillas
Instructions
  1. Grind the garlic and dried chilies in to paste and set it aside. Ideally use a mortar and pestle for this, but you a food processor, blender, or even a knife will do in a pinch.

  2. Roughly chop the the chicken in to the size of small pebbles. Don't chop it so fine that is like ground chicken as the texture makes a difference.

  3. Add the oil to the wok (or a large skillet) and place over high heat. Once the oil is hot, add the chicken and chili garlic paste. Cook, stirring continuously, until the chicken starts to brown.

  4. Remove chicken to a bowl, and add the onions and peppers. Cook, stirring continuously until the onions starts to brown.

  5. Lower the heat and add the chicken back to the wok along with the brown sauce. Continue to cook until the sauce is slightly thickened.

  6. Add the basil and the fresh chilies and continue to cook until the chilies begin to soften and the basil is wilted.

  7. Toast the tortillas in a dry frying pan or under a broiler until they begin to brown. Top the tortillas with the chicken and vegetable mixture and enjoy.

0 from 0 votes
Spicy Thai Chicken Tacos
Basic Chinese Brown Sauce
Prep Time
2 mins
Cook Time
8 mins
 

A classic Chinese sauce (at least in America)

Course: Condiment, Sauce
Cuisine: Chinese
Keyword: Brown Sauce
Servings: 4 Cups
Author: Daniel Peikes
Ingredients
  • 2 tbsp Corn Starch
  • 1/4 Cup Cold Water
  • 4 Cups Beef Broth Homemade would be ideal but store bought will work
  • 2 Cloves Garlic Minced
  • 1 tbsp Fresh Ginger Grated
  • 1/4 Cup "Oyster" sauce See recipe below
  • 1/2 Cup Brown Sugar
  • 2 tbsp Sesame Oil
  • 1/4 tsp White Pepper
Instructions
  1. In a small bowl combine the corn starch and the water. Stir until fully combined to create a slurry.

  2. Add all the rest of ingredients to a saucepan over medium heat. Add the corn starch and water slurry and stir to combine thoroughly.

  3. Allow the mixture to come to a boil and then reduce the heat to low. Allow the sauce to cook until reduced by 25%.

0 from 0 votes
Spicy Thai Chicken Tacos
"Oyster" Sauce
Prep Time
2 mins
Cook Time
3 mins
Total Time
4 mins
 

Oyster sauce is a thick sweet brown sauce that will add some caramel notes to any dish. It is usually made by reducing the liquid from oysters, I use oyster mushrooms to preserve the moniker and give the dish an umami boost.

Course: Sauce
Cuisine: Asian
Keyword: Oyster Sauce
Servings: 1 Cup
Author: Daniel Peikes
Ingredients
Instructions
  1. Add all the ingredients except the corn starch and water to a small sauce pot over low heat,stirring constantly. 

  2. Mix the corn starch and water in a separate bowl to form a slurry.  Once the sauce begins to bubble stir in the corn starch slurry and cook until the sauce is thickened and remove from heat.

Recipe Notes

This recipe contains affiliate links. We at MYV earn a small commission if you purchase an item through one of those links, which allows us to continue bringing you great tasting food.

Beef and Broccoli(ni) in Brown Sauce

Beef and BroccoliBrown Sauce

Beef and Broccoli is an (American) Chinese favorite and a dish that my wife adores. Why, you ask? Brown sauce, that umami laden, slightly sweet elixir, that accompanies many Americanized version of Asian style offerings that come in little white pails. Recently, I have had more than one request to come up with a recipe for brown sauce. More specifically brown sauce similar to the one offered by a long gone local Chinese restaurant called Mitsuyan. It was a favorite of many of my friends, as it was located in close proximity to couple of the local high schools.  One day I will get up the nerve to ask the former owner for the recipe and to taste my version, although I have sneaking suspicion theirs came from a bottle.

Keeping It Kosher

Brown sauce calls for oyster sauce as one of its ingredients.  I have included a recipe for my oyster-less sauce as a substitute to keep everything kosher, but if that is not concern of yours then go ahead and use the real thing.

Velveting Beef

While brown sauce may be what draws people to beef and broccoli, it is nothing without a the beef.  The question is how does your local take out joint get their meat tender while cooking it hot and fast in a wok?  Usually to tenderize meat you either need low temperature and a lot of time or extremely high quality beef.  The answer is a processes called velveting, where you change the pH of the meat preventing the proteins from binding. (Sorry for giving you flashbacks from chemistry class). There are a few methods for velveting, but Cooks Illustrated came up with the simplest by far, coating the meat with a mixture of baking soda and water and letting it sit for a mere 5 minutes.

Taking Beef and Broccoli Up a Notch

One thing I like to do to put my own spin on a dish, is to pick one ingredient elevate it.  For this recipe I substituted regular broccoli for its thinner and more elegant cousin, broccolini. If you can’t find broccolini, regular broccoli will work just fine. You can even frozen broccoli if you must.  If don’t like broccoli you can use other vegetables such as mushrooms, snow peas, and baby corn.

0 from 0 votes
Beef and Broccoli
Beef and Broccoli(ni)
Prep Time
15 mins
Cook Time
15 mins
 

An elevated take on take out Chinese Beef and Broccoli

Course: Dinner, Main Course, Main Dish
Cuisine: Chinese
Keyword: Beef and Broccoli, Brown Sauce
Author: Daniel Peikes
Ingredients
  • 1 lb Sliced Pepper Steak Meat
  • 1 lb Broccolini Cut in to pieces and stems trimmed to a manageable size. Regular broccoli will also work. (Even frozen if need be).
  • 1 Large Red Onion Sliced thinly
  • 2 Cups Basic Brown Sauce See recipe below
  • 1/4 Cup Vegetable Oil
  • 1 tsp Baking Soda
  • 1 tbsp Water
  • 1/4 Cup Soy Sauce
  • 1/4 Cup Brown Sugar
  • 1/4 Cup Rice Vinegar
  • 3 tbsp Corn Starch
  • 2 Scallions Sliced thinly for garnish
  • 2 Cups Cooked White Rice
Instructions
  1. Put the pepper steak in a large mixing bowl. In a separate bowl, mix the baking soda and water and then add to the meat. Stir to coat. Allow the meat to sit for 5 minutes.

  2. Make a marinade/coating for the beef by mixing the soy sauce, brown sugar, and rice vinegar in another mixing bowl. Add the corn starch to the mixture, stirring until completely dissolved. Pour the marinade over the meat and stir to coat. Allow the meat to marinate for 15 minutes.

  3. Add 2 tablespoons of oil to your wok or frying pan and put over the highest heat your stove can muster. Once the oil is hot, add half of the beef, making sure there is space between each piece. If the pan is too small to fit half the meat without pieces touching, then work in smaller batches. Cook the beef on each side until browned, and repeat with the other half of the meat. Add more oil between batches if necessary.

  4. Once all of the meat is cooked remove it from the pan. Add 2 more tablespoons of oil and the onions, stirring constantly. Once the onions begin to soften add the broccoli(ni). Keep the onions and broccoli moving until the broccoli begins to soften and get some color.

  5. Add the meat back into the pan along with the brown sauce and cook until the sauce reaches your desired consistency.

  6. Serve over rice and garnish with the scallions.

0 from 0 votes
Spicy Thai Chicken Tacos
Basic Chinese Brown Sauce
Prep Time
2 mins
Cook Time
8 mins
 

A classic Chinese sauce (at least in America)

Course: Condiment, Sauce
Cuisine: Chinese
Keyword: Brown Sauce
Servings: 4 Cups
Author: Daniel Peikes
Ingredients
  • 2 tbsp Corn Starch
  • 1/4 Cup Cold Water
  • 4 Cups Beef Broth Homemade would be ideal but store bought will work
  • 2 Cloves Garlic Minced
  • 1 tbsp Fresh Ginger Grated
  • 1/4 Cup "Oyster" sauce See recipe below
  • 1/2 Cup Brown Sugar
  • 2 tbsp Sesame Oil
  • 1/4 tsp White Pepper
Instructions
  1. In a small bowl combine the corn starch and the water. Stir until fully combined to create a slurry.

  2. Add all the rest of ingredients to a saucepan over medium heat. Add the corn starch and water slurry and stir to combine thoroughly.

  3. Allow the mixture to come to a boil and then reduce the heat to low. Allow the sauce to cook until reduced by 25%.

0 from 0 votes
Spicy Thai Chicken Tacos
"Oyster" Sauce
Prep Time
2 mins
Cook Time
3 mins
Total Time
4 mins
 

Oyster sauce is a thick sweet brown sauce that will add some caramel notes to any dish. It is usually made by reducing the liquid from oysters, I use oyster mushrooms to preserve the moniker and give the dish an umami boost.

Course: Sauce
Cuisine: Asian
Keyword: Oyster Sauce
Servings: 1 Cup
Author: Daniel Peikes
Ingredients
Instructions
  1. Add all the ingredients except the corn starch and water to a small sauce pot over low heat,stirring constantly. 

  2. Mix the corn starch and water in a separate bowl to form a slurry.  Once the sauce begins to bubble stir in the corn starch slurry and cook until the sauce is thickened and remove from heat.

Recipe Notes

This recipe contains affiliate links. We at MYV earn a small commission if you purchase an item through one of those links, which allows us to continue bringing you great tasting food.

If you liked this recipe, check out some of our other Asian recipes:

Pho gà-Vietnamese Spiced Chicken Soup

Thai One On: Drunken Noodles

Thai Chicken Won-tons With Peanut Dipping Sauce